Frontend Mutual TLS Configuration
After platform deployment, TLS server-side (one-way) authentication is enabled by default. This article introduces how to enable client verification (mutual) authentication when server-side authentication already exists.
The entire cloud platform runs on Kubernetes, and frontend services are exposed through ingress. We use the open-source traefik component to handle ingress implementation, so client authentication is set on traefik.
Generate Certificates
The following uses self-signed certificate generation for configuration. If you already have server and client certificates issued by a certificate authority, you can skip this step.
Generate CA
$ openssl req -x509 -sha256 -newkey rsa:4096 -keyout ca.key -out ca.crt -days 356 -nodes -subj '/CN=My Cert Authority'
Generate Server Certificate
Issue server certificate based on the CA generated above:
$ openssl req -new -newkey rsa:4096 -keyout server.key -out server.csr -nodes -subj '/CN=mydomain.com'
$ openssl x509 -req -sha256 -days 365 -in server.csr -CA ca.crt -CAkey ca.key -set_serial 01 -out server.crt
Generate Client Certificate
Issue client certificate based on the CA generated above:
$ openssl req -new -newkey rsa:4096 -keyout client.key -out client.csr -nodes -subj '/CN=My Client'
$ openssl x509 -req -sha256 -days 365 -in client.csr -CA ca.crt -CAkey ca.key -set_serial 02 -out client.crt
Upload Certificates to Kubernetes
# Upload ca to kube-system namespace
$ kubectl -n kube-system create secret generic ca-secret --from-file=ca.crt=ca.crt

# Upload server certificate to onecloud namespace
$ kubectl -n onecloud create secret generic tls-secret --from-file=tls.crt=server.crt --from-file=tls.key=server.key
Modify Frontend default-web ingress
The frontend is accessed through the default-web ingress in the onecloud namespace. Replace the tls certificate used by the frontend with tls-secret.
$ kubectl edit ingress -n onecloud default-web
...
  tls:
  # Modify this secretName to tls-secret
  - secretName: tls-secret
...
Modify traefik Configuration
Modify traefik configmap
traefik's configuration is in the traefik-ingress-lb config in the kube-system namespace. Enabling client verification mainly configures entryPoints.https.tls.ClientCA.
$ kubectl edit configmaps -n kube-system traefik-ingress-lb
...
     [entryPoints.https]
        address = ":443"
        # Add the following ClientCA configuration
        [entryPoints.https.tls]
          [entryPoints.https.tls.ClientCA]
          files = ["/tests/ca.crt"]
          optional = false
...
Modify traefik daemonset
Then modify the traefik-ingress-controller daemonset in the kube-system namespace, mainly mounting the ca-secret created earlier to the configured /tests/ca.crt directory.
$ kubectl edit daemonsets -n kube-system traefik-ingress-controller
...
        volumeMounts:
        - mountPath: /config
          name: config
        # Add this volume mount, name is ca
        - mountPath: /tests
          name: ca
...
      volumes:
      - configMap:
          defaultMode: 420
          name: traefik-ingress-lb
        name: config
      - name: ca
        secret:
          defaultMode: 420
          # Here reference the ca-secret created earlier
          secretName: ca-secret
...
Restart traefik service
$ kubectl get pods -n kube-system | grep traefik | awk '{print $1}' | xargs kubectl delete pods -n kube-system
Wait for traefik container to become Running.
$ kubectl get pods -n kube-system | grep traefik
traefik-ingress-controller-fk54h           1/1     Running       0          9s
Test Using curl
Assuming the deployed frontend access address is https://192.168.121.21, verify if client authentication is enabled:
# Access without client certificate fails, as expected
$ curl -k https://192.168.121.21
curl: (58) NSS: client certificate not found (nickname not specified)

# Access with client certificate succeeds
$ curl -k --cert ./client.crt --key ./client.key https://192.168.121.21
<!DOCTYPE html><html lang=en translate=no><head><meta charset=utf-8><meta http-equiv=X-UA-Compatible content="IE=edge"><meta name=viewport content="width=device-width,initial-scale=1"><meta name=google content=notranslate><link rel=icon href=/favicon.ico><title>云联壹云</title><link href=/js/chunk-2d216214.5f7b7e0c.js rel=prefetch><link href=/js/chunk-39bb5eb4.8512e62d.js rel=prefetch><link href=/css/app.fb52a32e.css rel=preload as=style><link href=/css/chunk-vendors.09e9c25d.css rel=preload as=style><link href=/js/app.74cda7af.js rel=preload as=script><link href=/js/chunk-vendors.a7b5c015.js rel=preload as=script><link href=/css/chunk-vendors.09e9c25d.css rel=stylesheet><link href=/css/app.fb52a32e.css rel=stylesheet></head><body><noscript><strong>We're sorry but OneCloud doesn't work properly without JavaScript enabled. Please enable it to continue.</strong></noscript><div id=app></div><script src=/vendor.b82688a471b737ceddd1.js></script><script src=/js/chunk-vendors.a7b5c015.js></script><script src=/js/app.74cda7af.js></script></body></html>
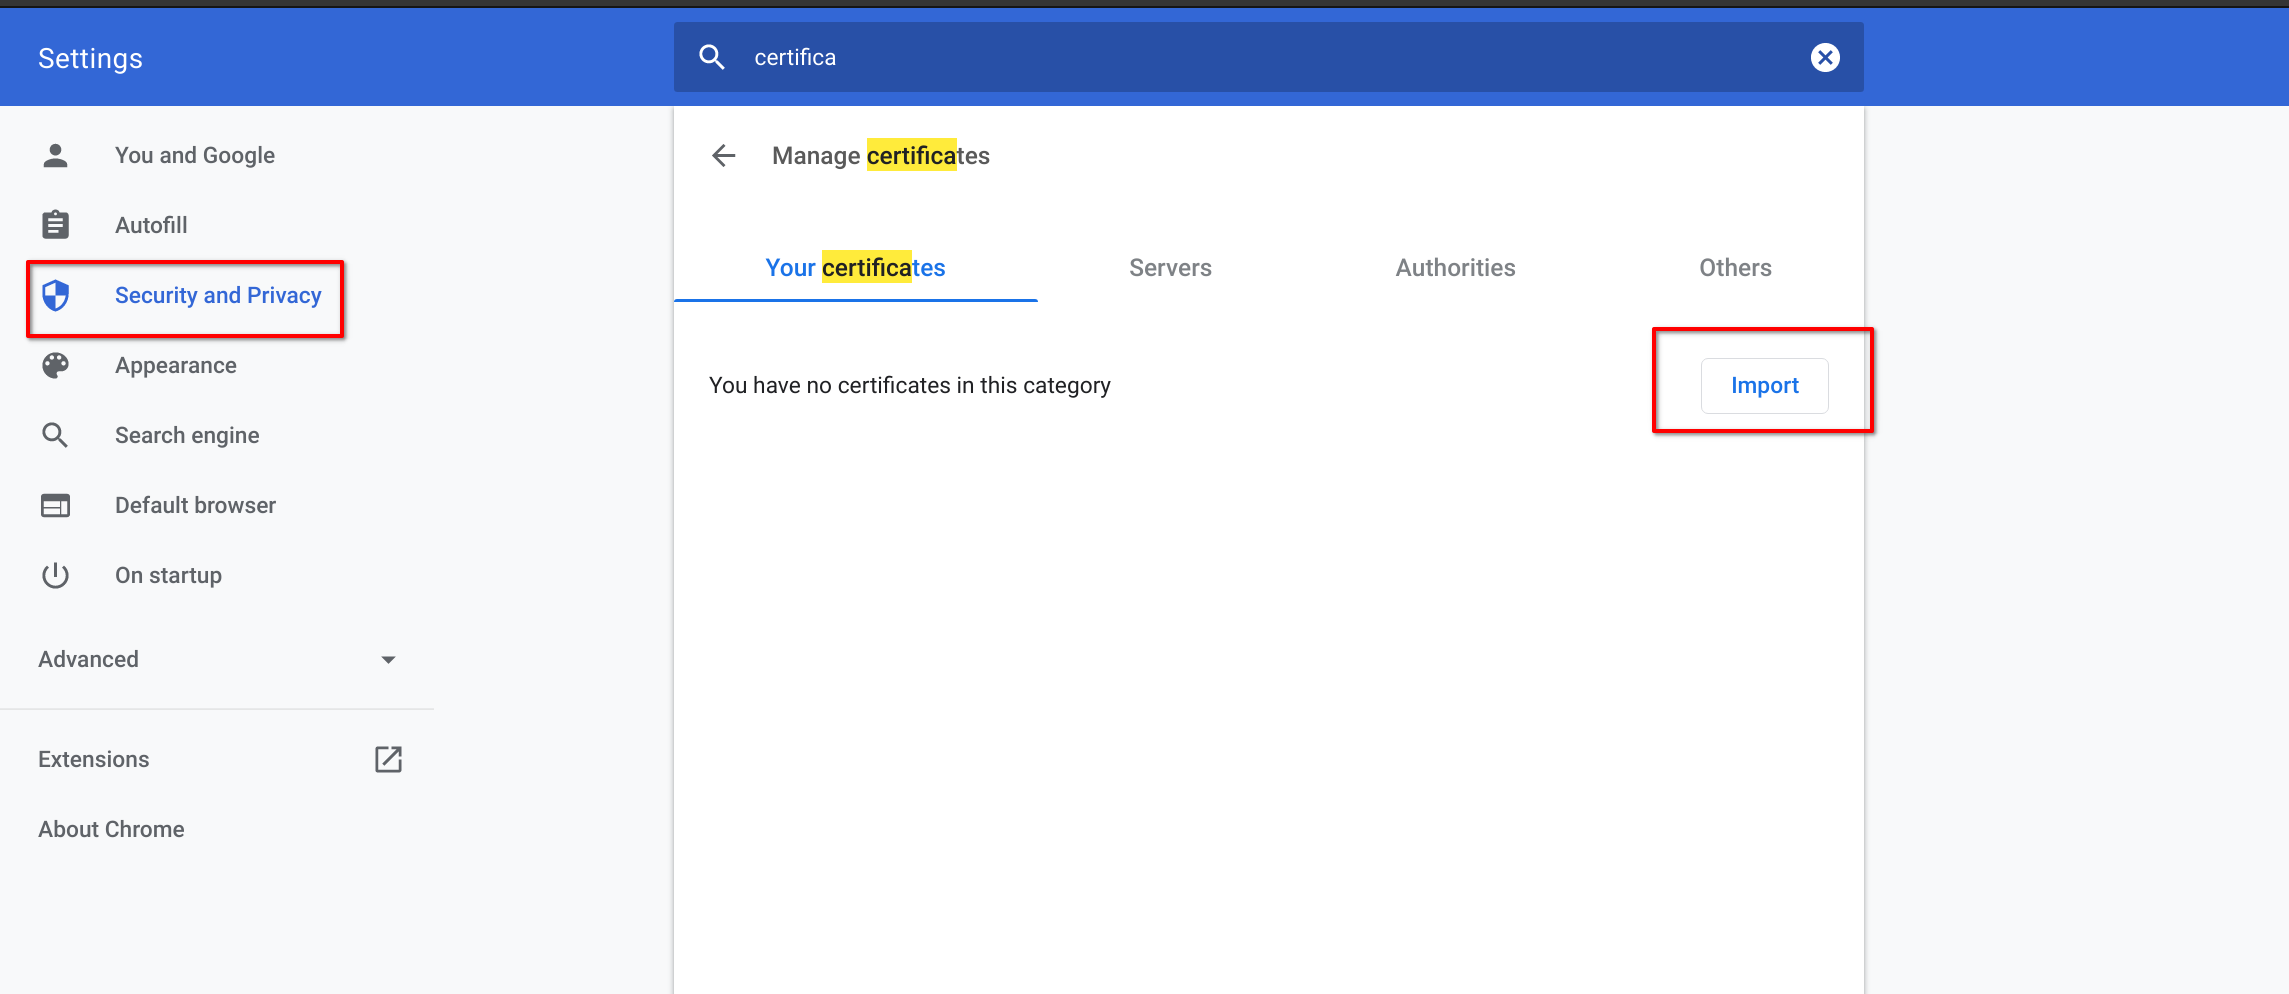
Browser Configuration
Through the above configuration, client configuration is found to be successful, but to access through a browser, you also need to put the client certificate in the browser, otherwise access will show the following interface:

The following uses Chrome browser as an example. Need to convert the previously generated client.crt and client.key to pfx/pkcs12 format to import into the browser, command as follows:
# Combine client.crt and client.key together
$ cat client.crt client.key > pkcs12.pem

# Convert to pkcs12 format
$ openssl pkcs12 -in pkcs12.pem -export -out pkcs12.p12
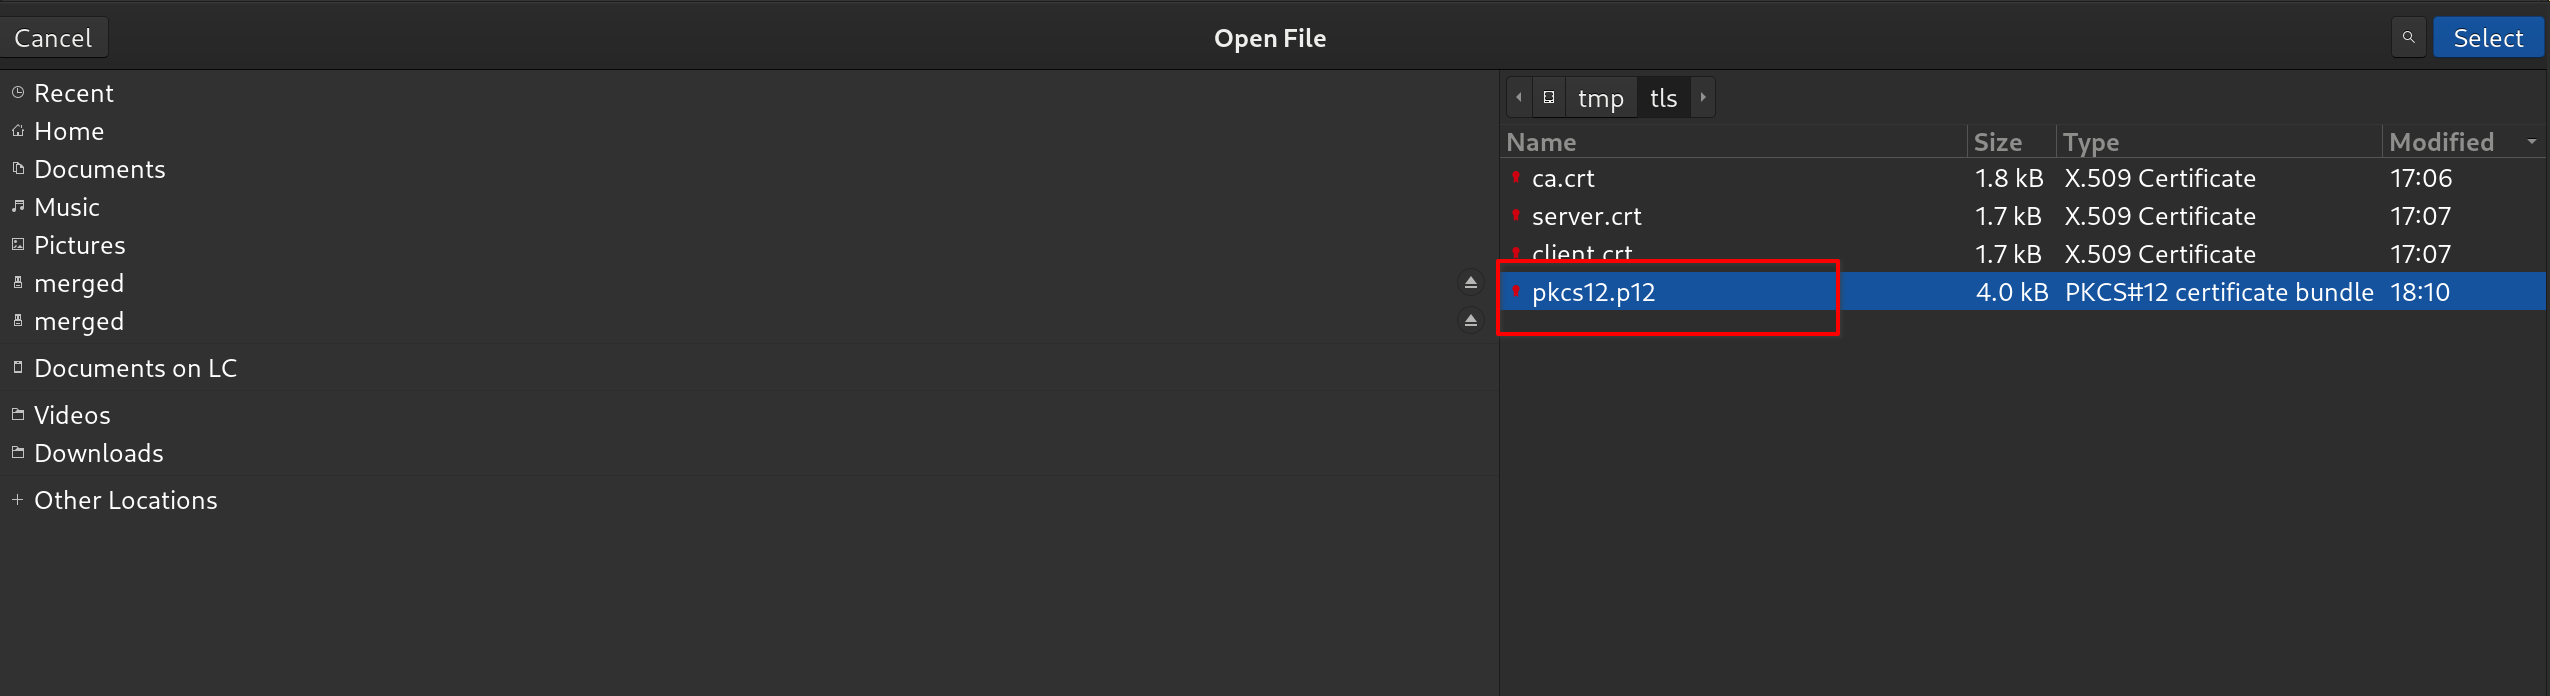
Import pkcs12.p12 into the browser:
Select the pkcs12.p12 certificate generated earlier:
After importing, refresh and access the frontend, and you can successfully access the interface.