OpenClaw
OpenClaw 🦞 is an open-source, self-hosted personal intelligent agent assistant that does not require a GPU. Once deployed, you can quickly create and use it from the console.
Quick Start
1. Create an Application Instance
- In the console, go to Artificial Intelligence → Applications → Application Instances, click Create, and select OpenClaw as the type.
- Application Template: The platform usually provides a preset OpenClaw application template. When creating an instance, simply select the corresponding default template.
If you need to customize the image/resource configuration/parameters, go to Artificial Intelligence → Applications → Application Templates to create or edit one.

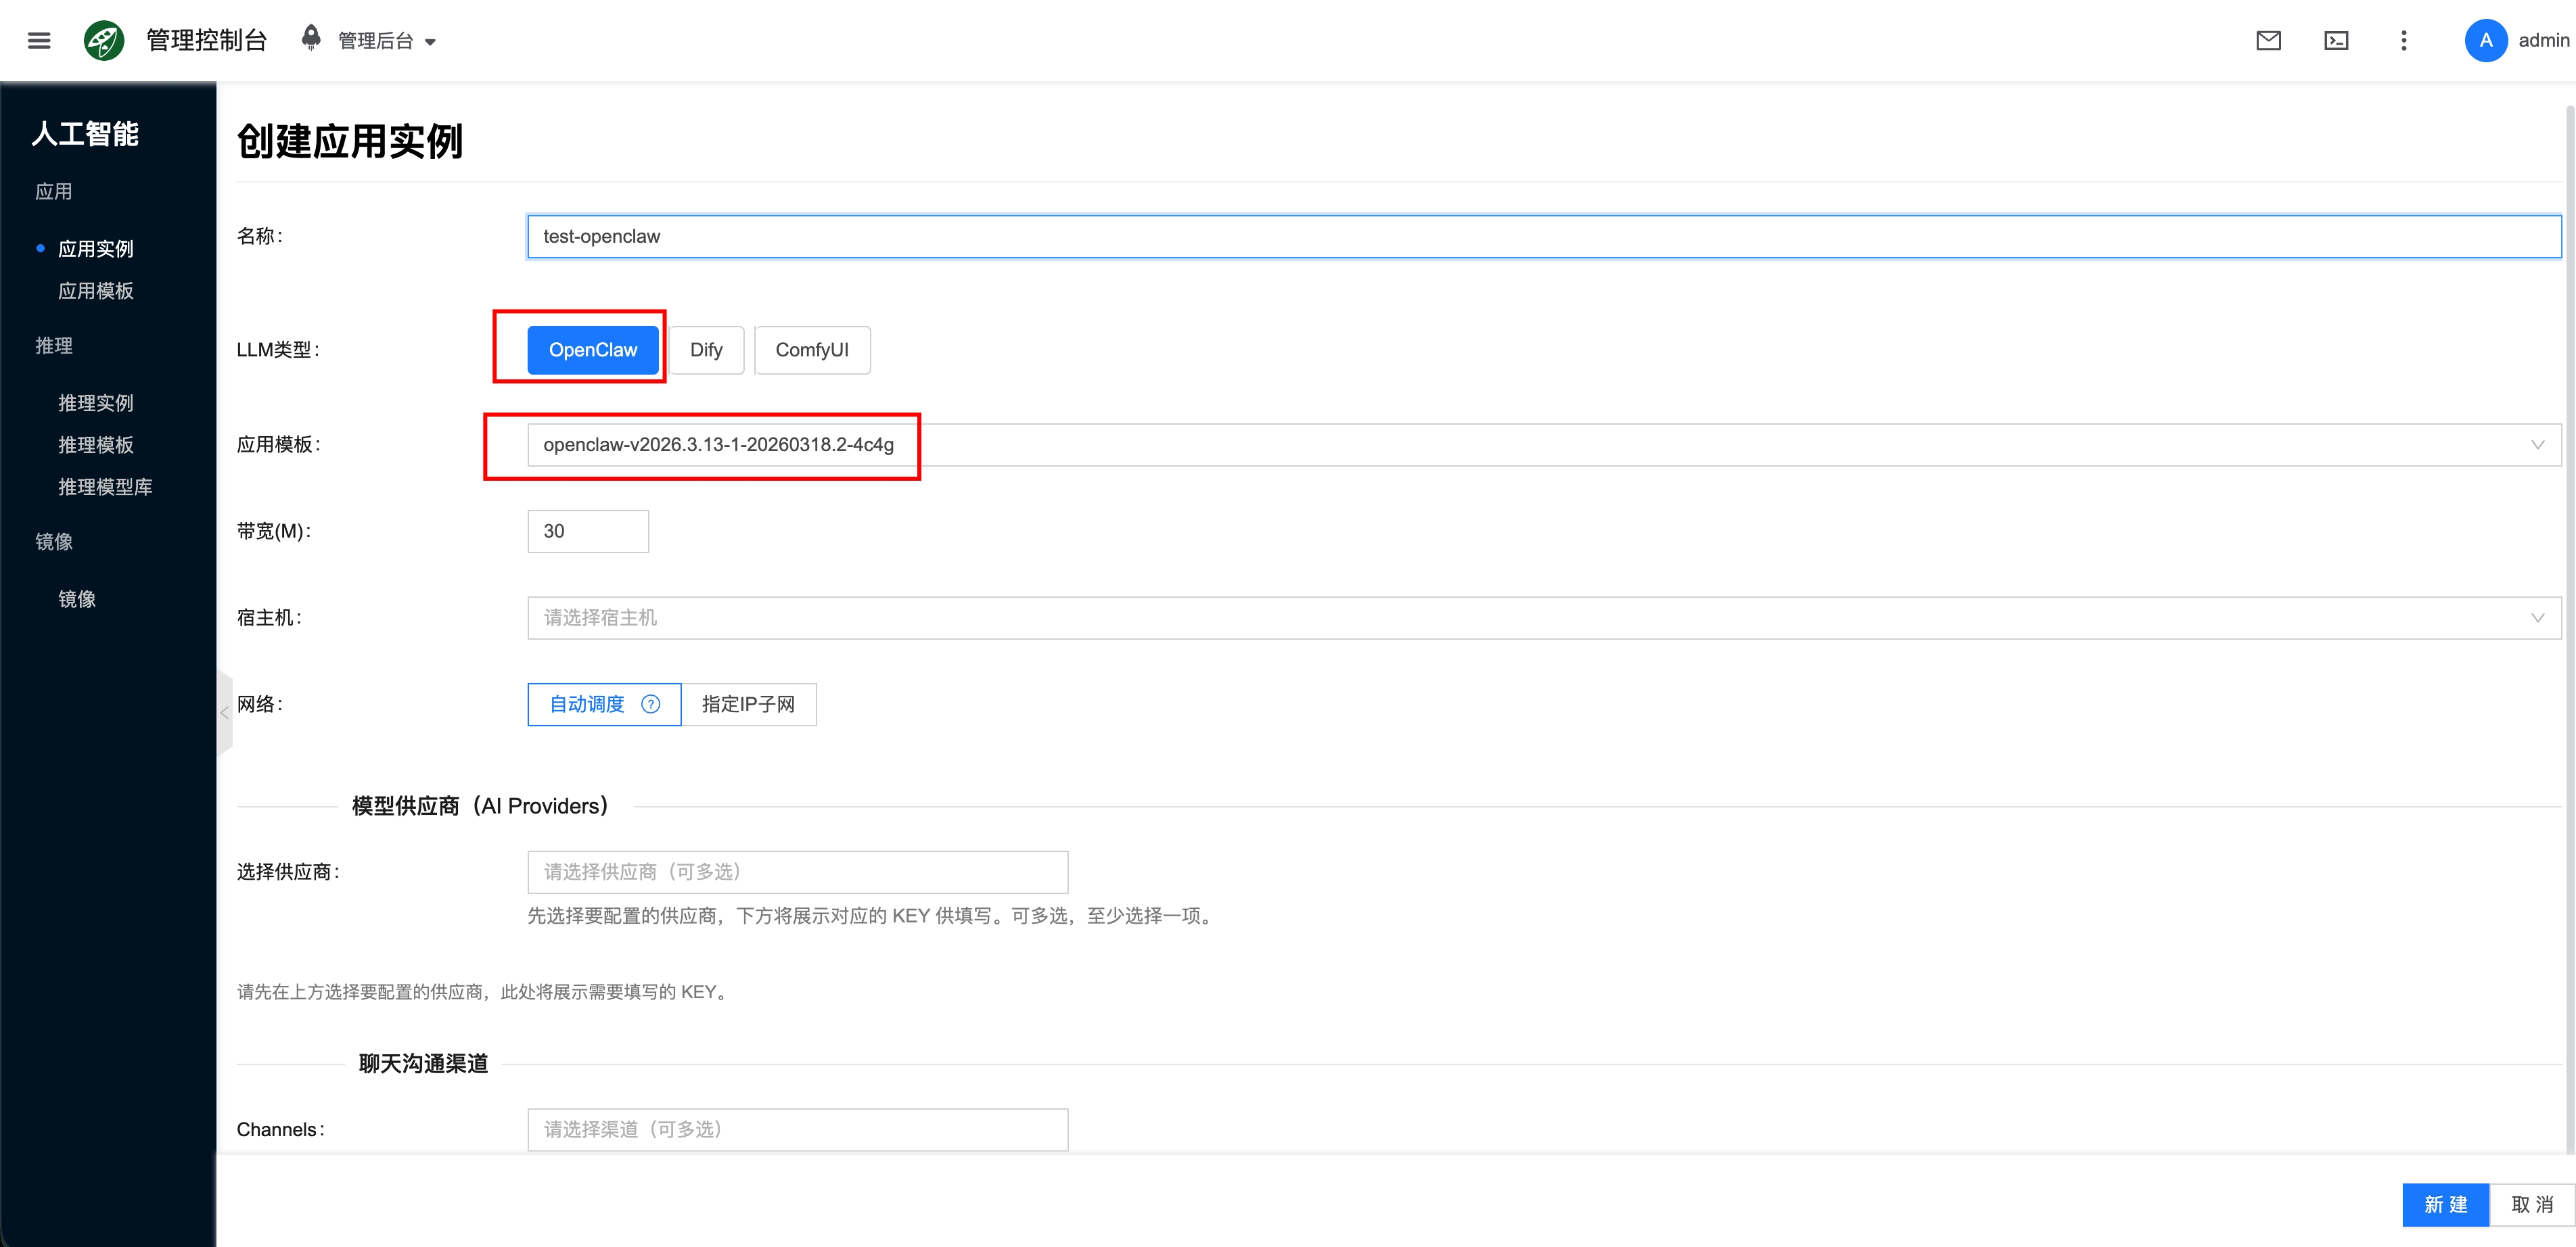
- Bandwidth: Rate-limits the container network; fill in based on actual needs.
- Host (optional): You can specify a host to run the OpenClaw container instance on; if not selected, it will be automatically scheduled.
- Network: You can choose automatic scheduling or specify an IP subnet.
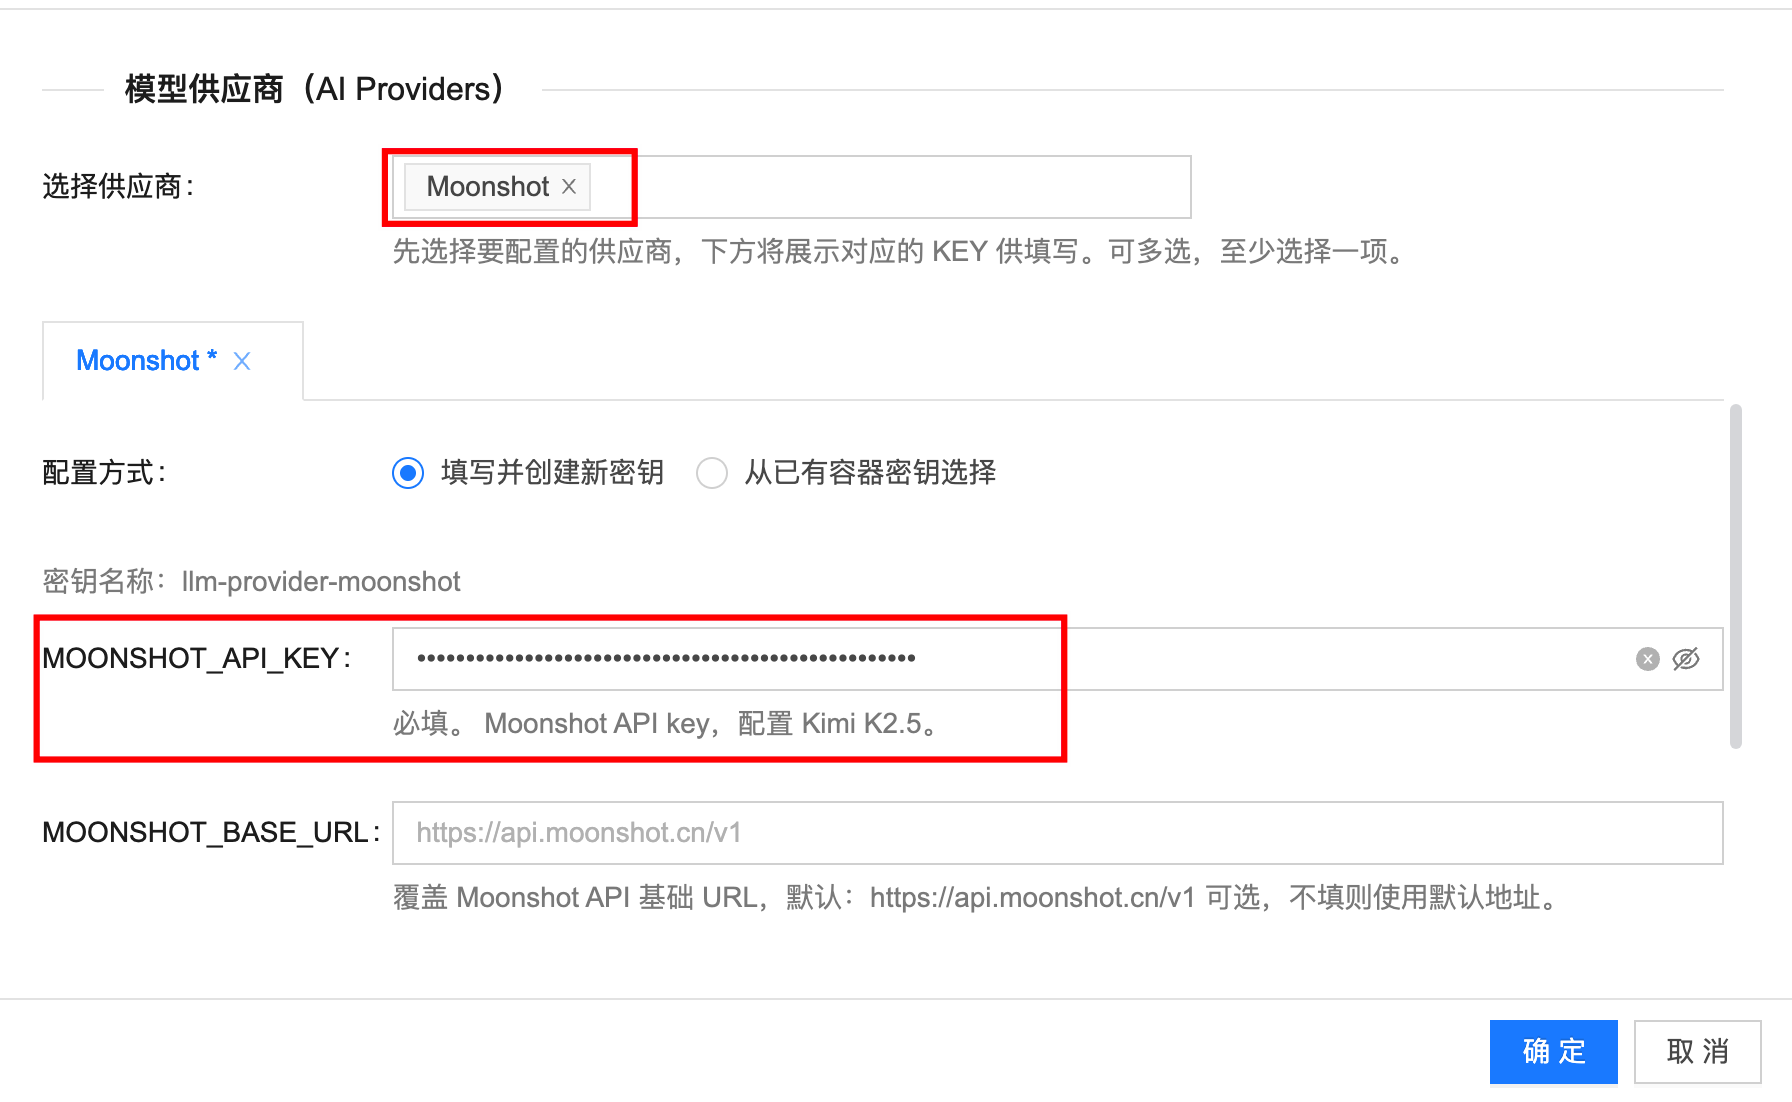
2. Configure Model Providers
When creating/editing an instance, configure an API Key for at least one provider. For how to configure and obtain API Keys for model providers, refer to: Model Provider Configuration.
Select the corresponding provider and fill in the relevant API Key. The following example uses Moonshot:
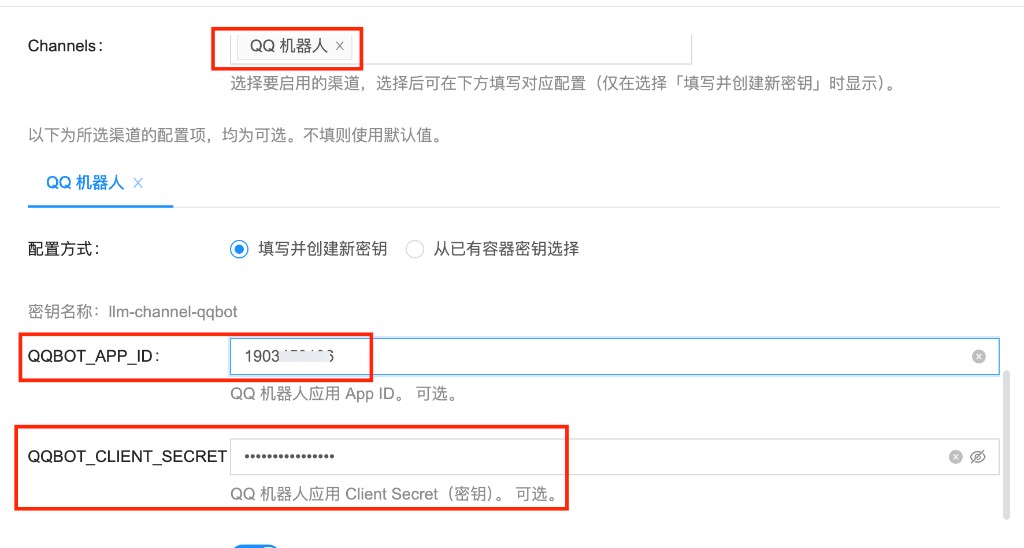
3. Configure Chat Communication Channels
Configure chat communication channels as needed (QQ, Feishu, Telegram, Discord, etc.), and fill in the corresponding authentication information for interacting with OpenClaw through chat. Each channel has different methods for obtaining authentication information. For configuration details, refer to: Chat Communication Channel Configuration.
Select the corresponding notification channel and fill in the relevant authentication information. The following example uses QQ Bot:
4. Access and Login
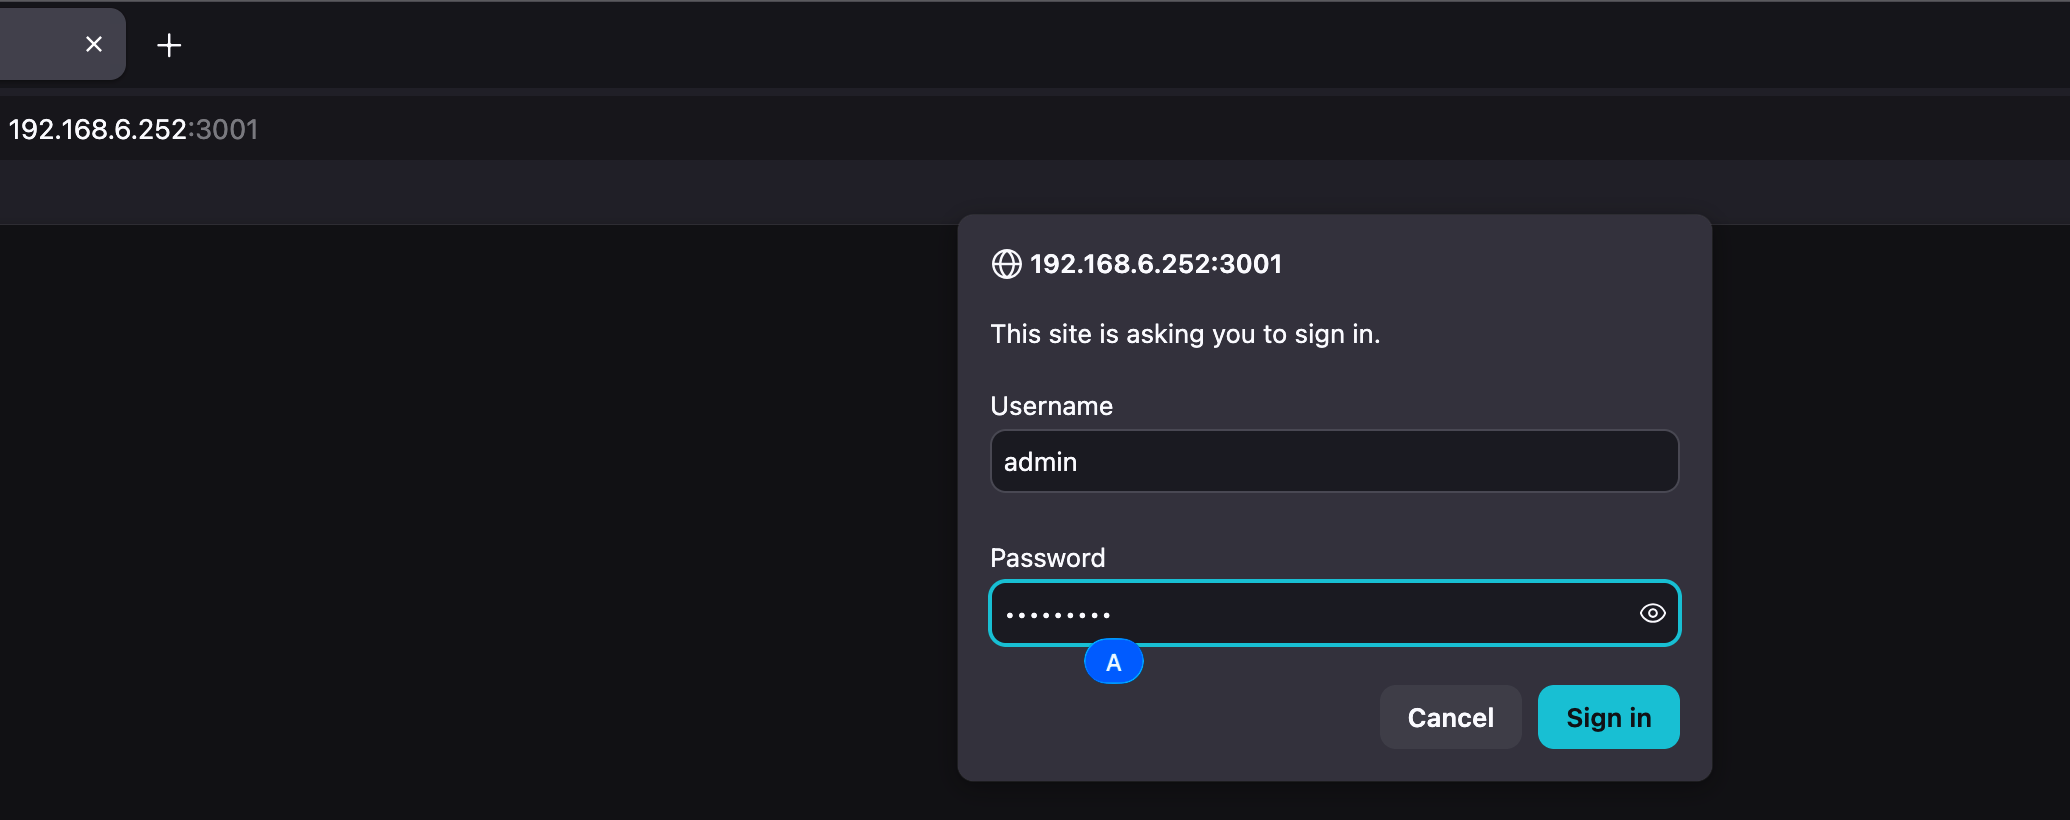
Go to the instance details page, view the login information, obtain the access URL and user credentials, and open it in a browser.
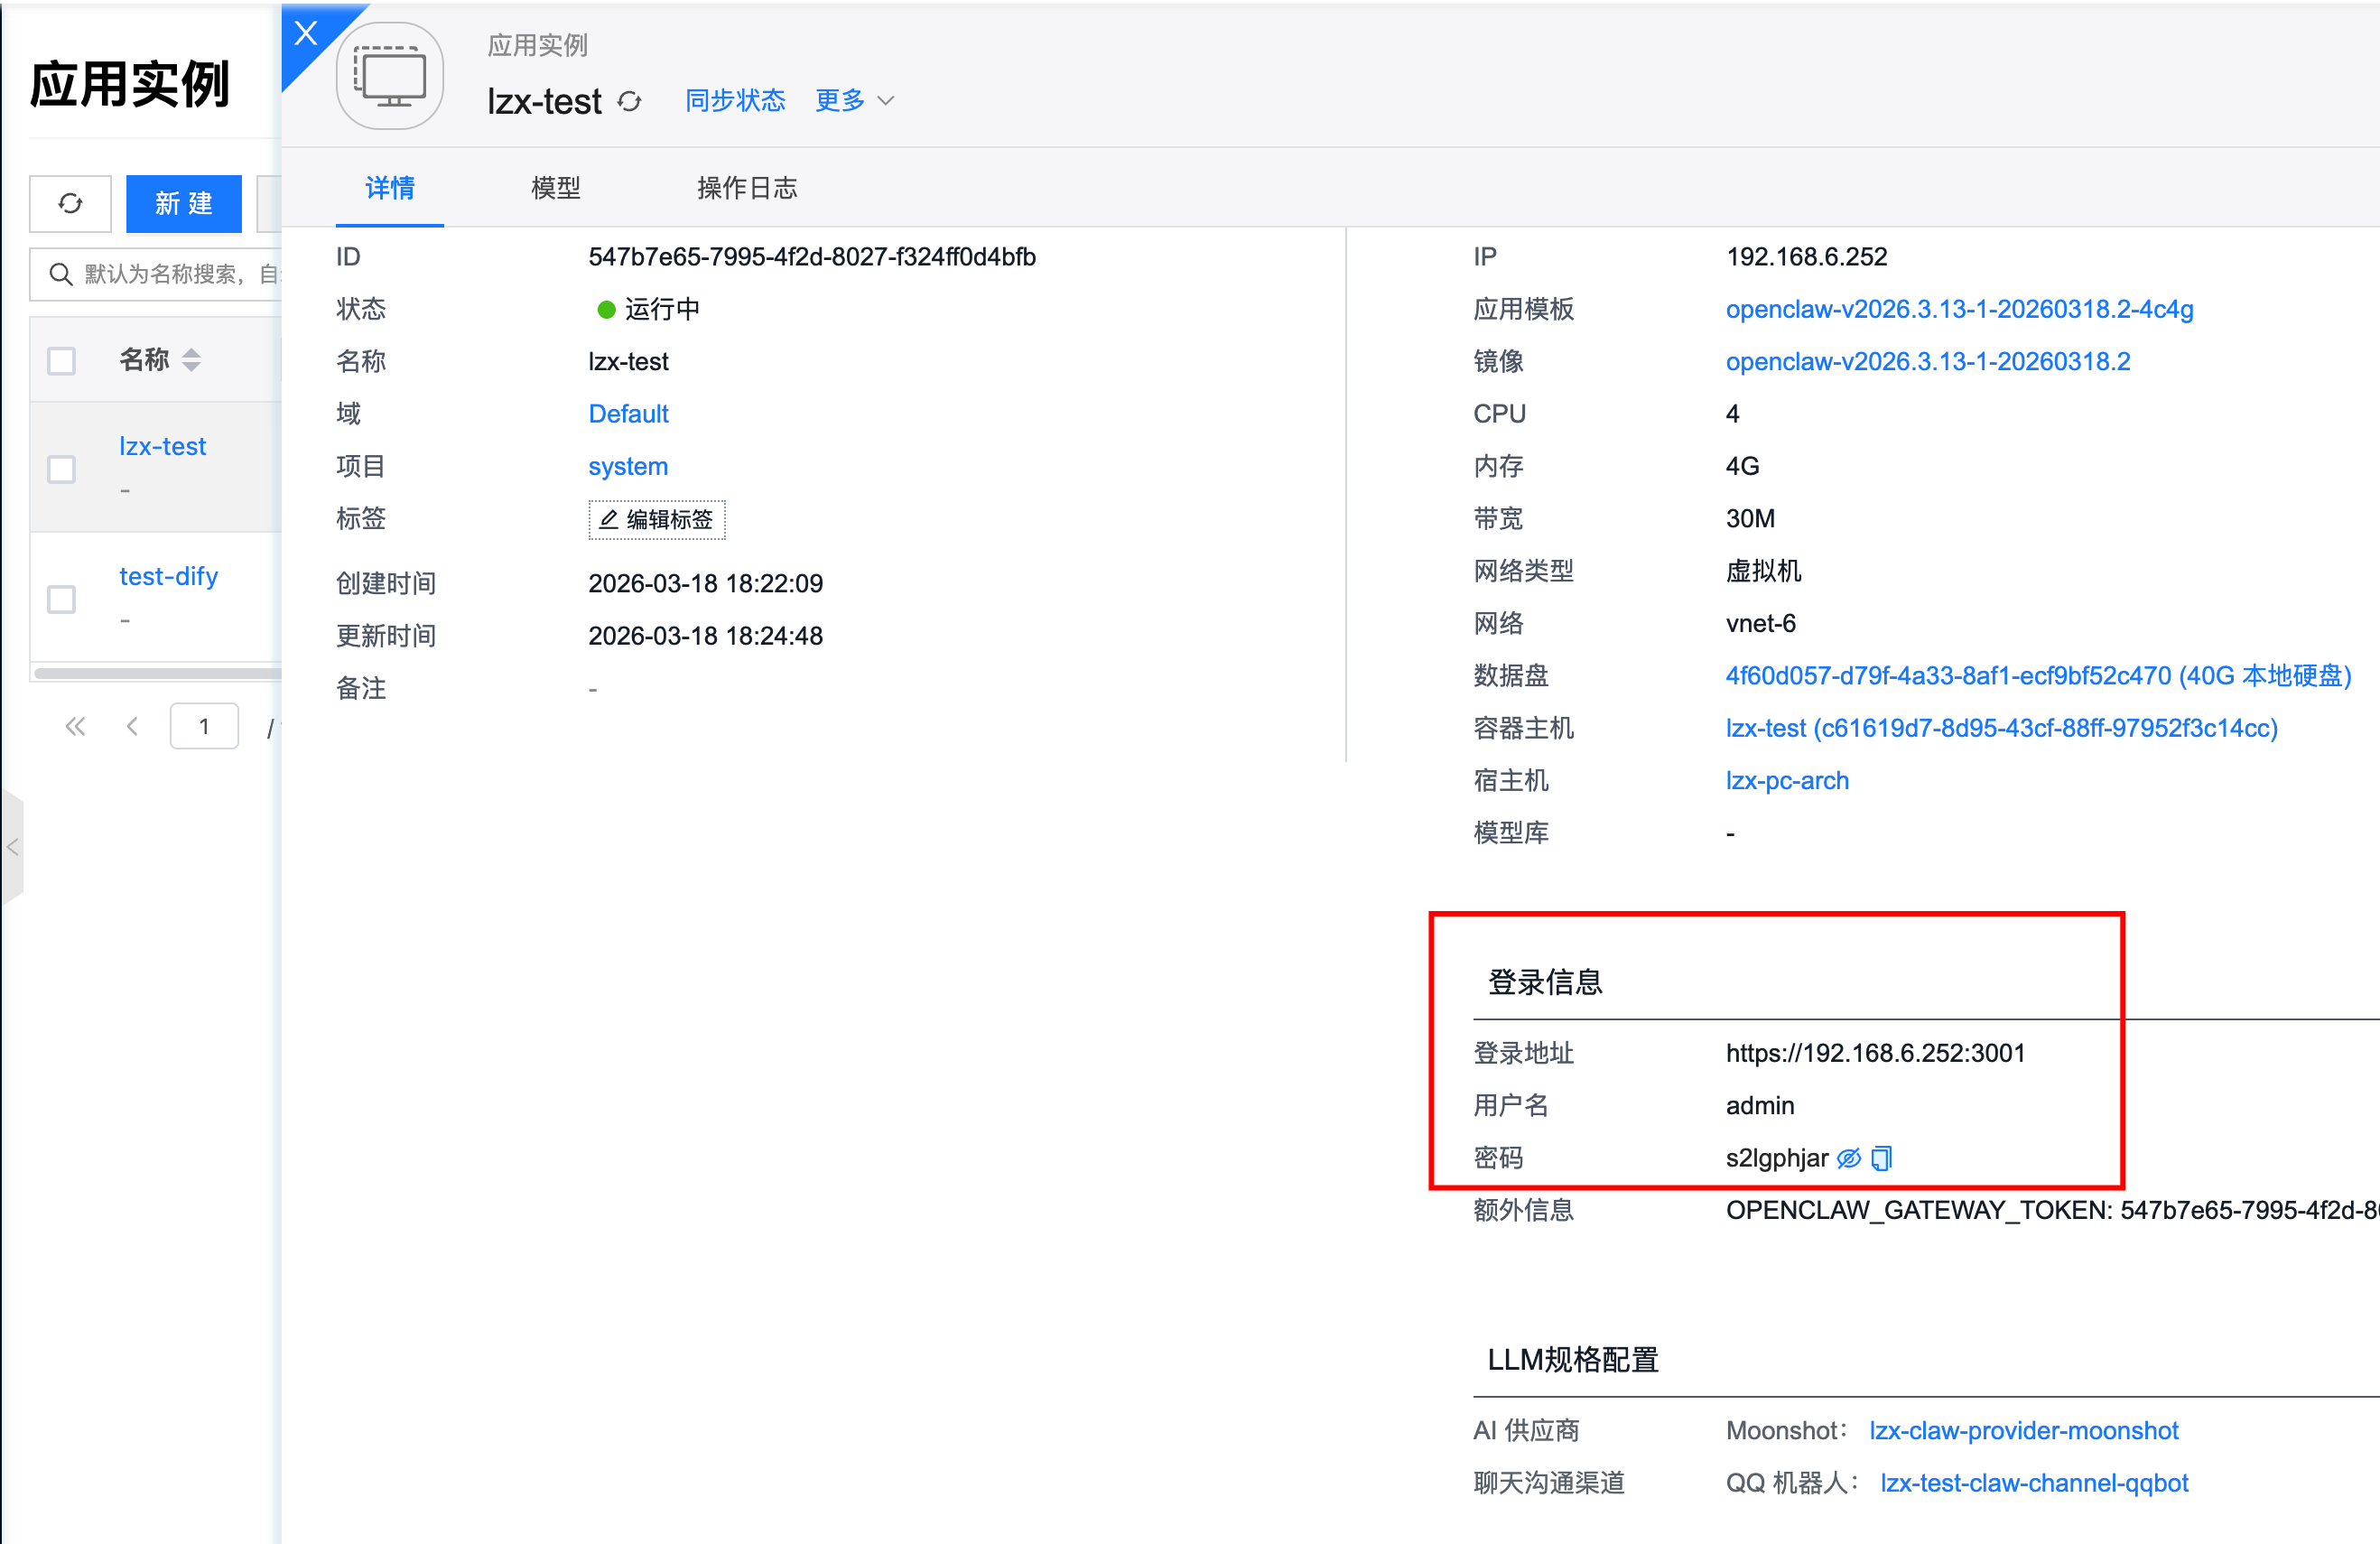
The username and password are HTTP auth credentials. When opening in a browser, you will be prompted to enter them:
After entering the credentials, you will see the container desktop running OpenClaw, where you can perform debugging and additional operations:

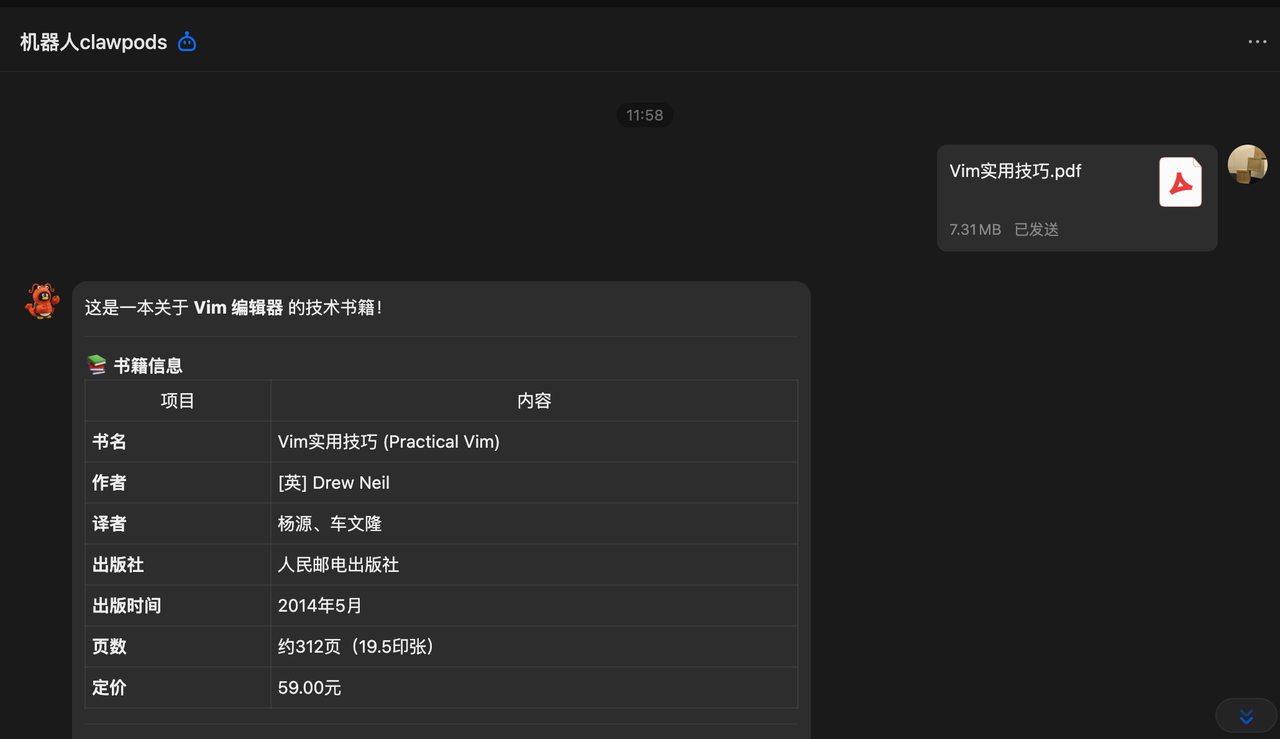
5. Chat Communication
If the QQ Bot chat channel is correctly configured, you can send messages to the bot in QQ to use OpenClaw as an AI assistant. For example, asking it to summarize a PDF document:
Configuration
Model Providers
Moonshot
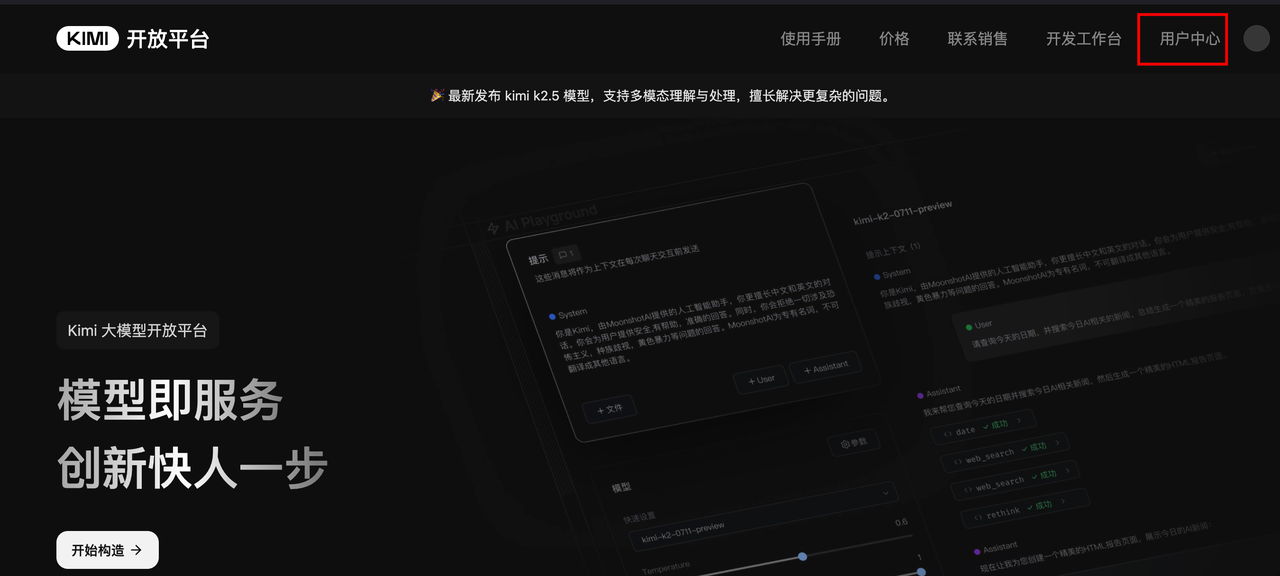
Log in to the Console
Visit https://platform.moonshot.cn/, register a user account, log in to the console, and then click User Center:
Create an API Key
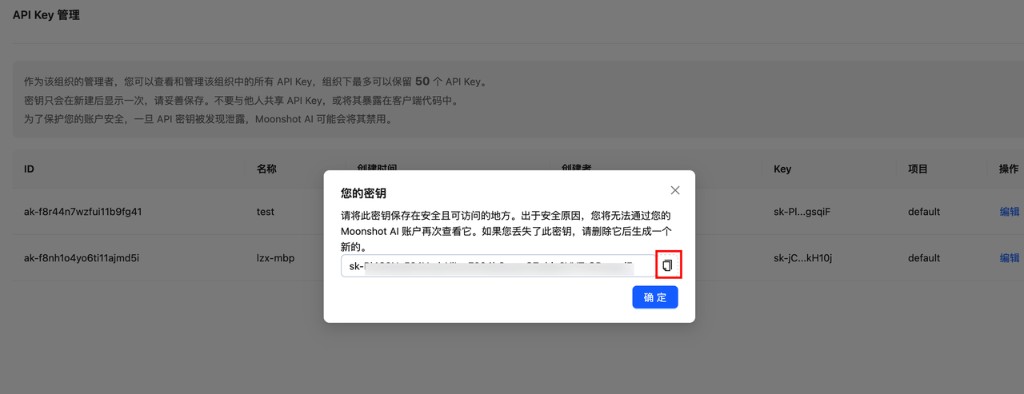
Create a new API key:
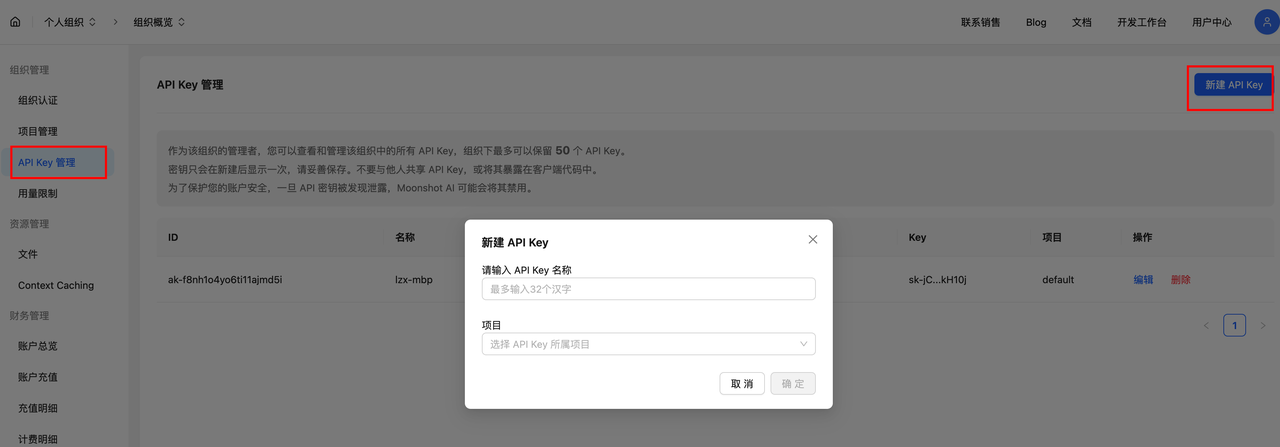
Copy the created key:
Zhipu (ZHIPU)
Visit the Zhipu API Keys Management Page, register a user account and log in, then create an API Key and copy it for safekeeping.
MiniMax
Visit the MiniMax API Key Management Page, register a user account and log in, then create an API Key and copy it for safekeeping.
Chat Communication Channels
QQ Bot
Register on QQ Open Platform
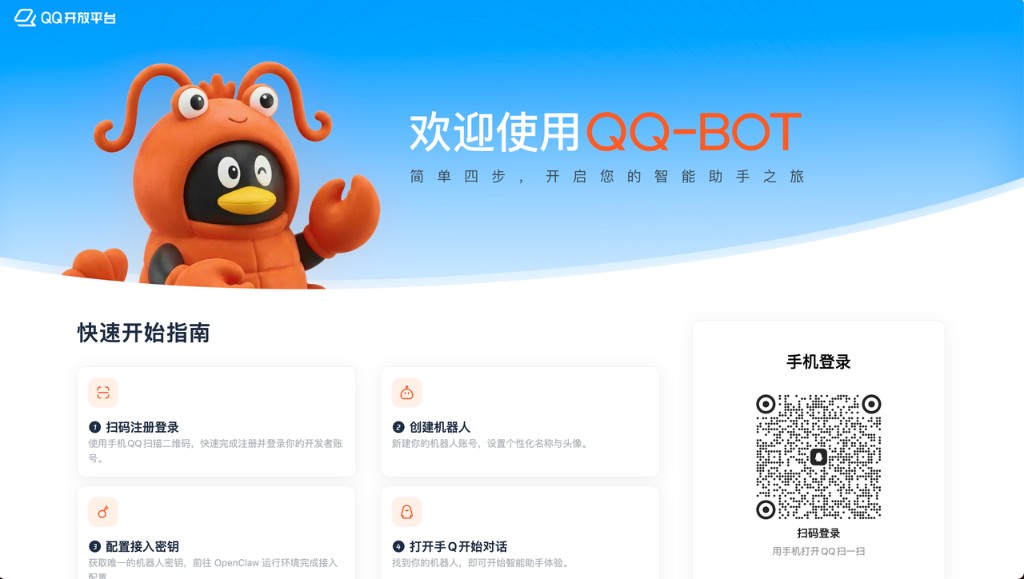
Go to the Tencent QQ Open Platform official website and scan the QR code with your mobile QQ to register/log in.
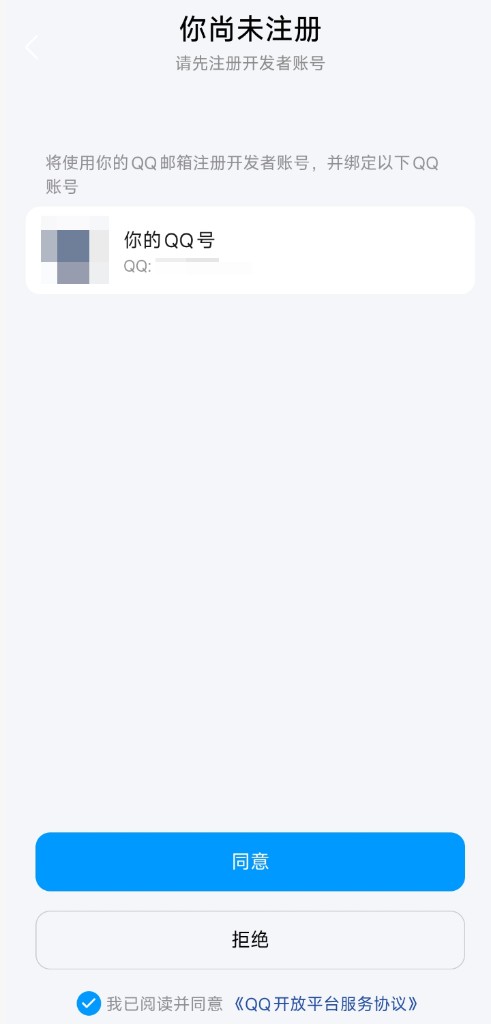
Note: If you have not yet registered on the QQ Open Platform, the system will automatically complete the registration process after scanning the QR code and bind the QQ account used for scanning with the platform account.
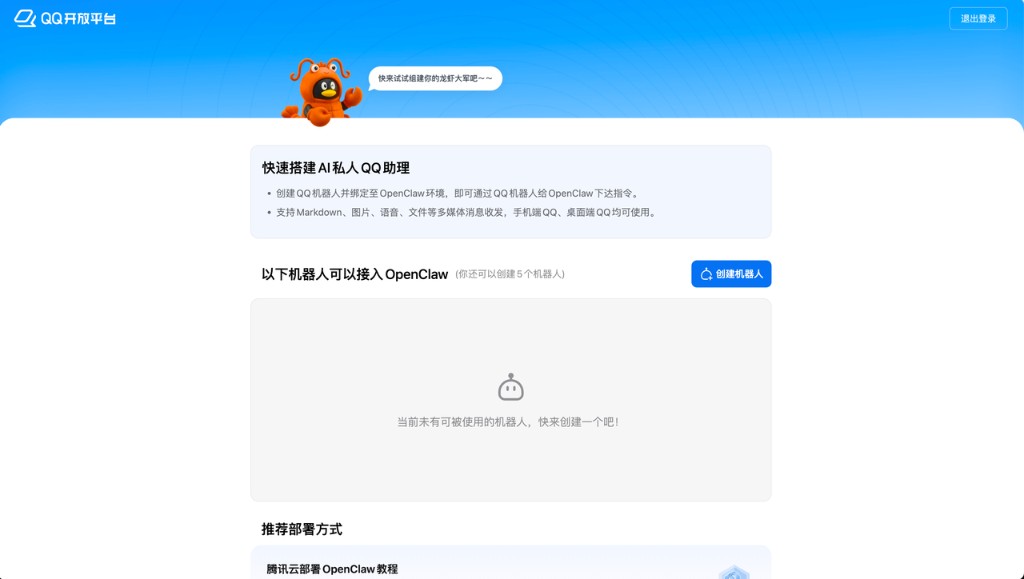
After scanning with mobile QQ and selecting "Agree", registration is complete, and you will enter the QQ Bot configuration page.
Create a QQ Bot
On the QQ Bot page of the QQ Open Platform, you can click "Create Bot" to directly create a new QQ bot.

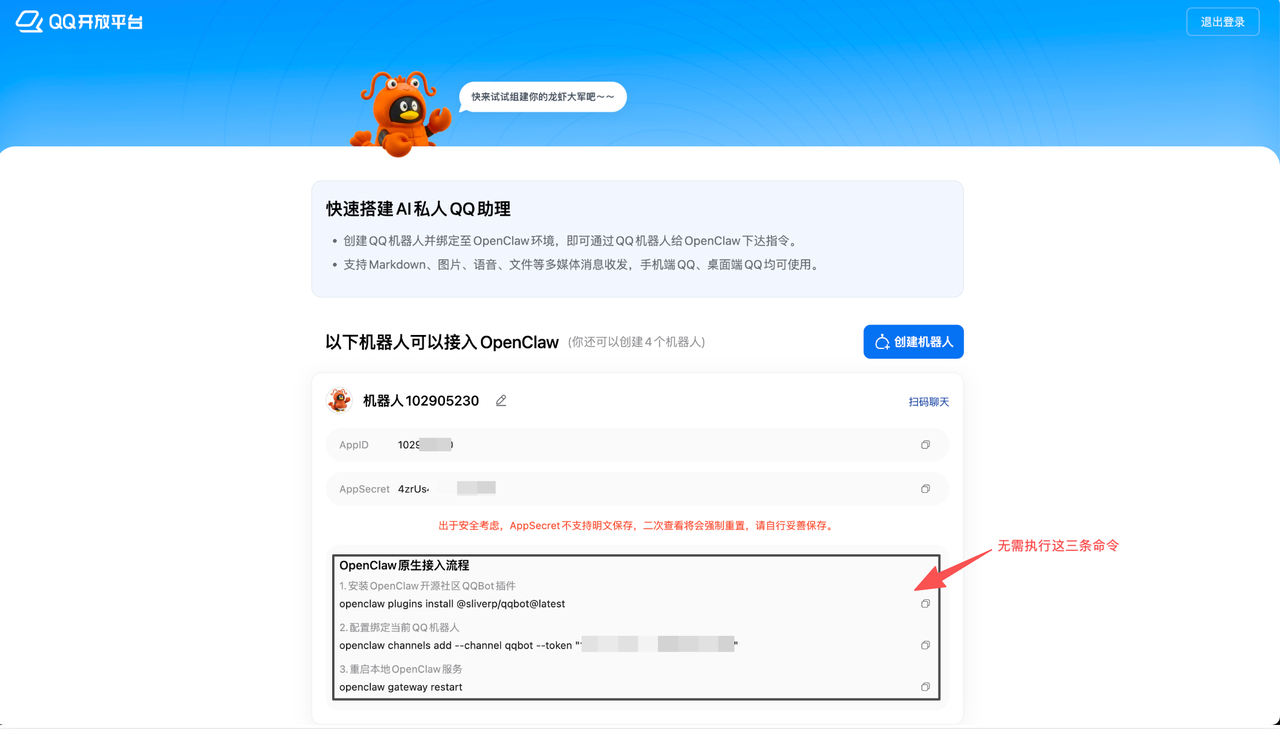
After the bot is created, find the "AppID" and "AppSecret" parameters on the page, click the "Copy" button on the right side of each, and save them to your personal notepad or memo (please keep them safe and do not leak them; pay attention to data security). They will be needed in subsequent steps.
Using AppID and AppSecret
When creating an OpenClaw application and selecting QQ Bot as the notification channel, fill in the following information:
- AppID: corresponds to QQBOT_APP_ID
- AppSecret: corresponds to QQBOT_CLIENT_SECRET
Feishu
Configure the Bot
For Feishu configuration, refer to the OpenClaw official documentation: https://docs.openclaw.ai/channels/feishu#step-1-create-a-feishu-app.
Using AppID and AppSecret
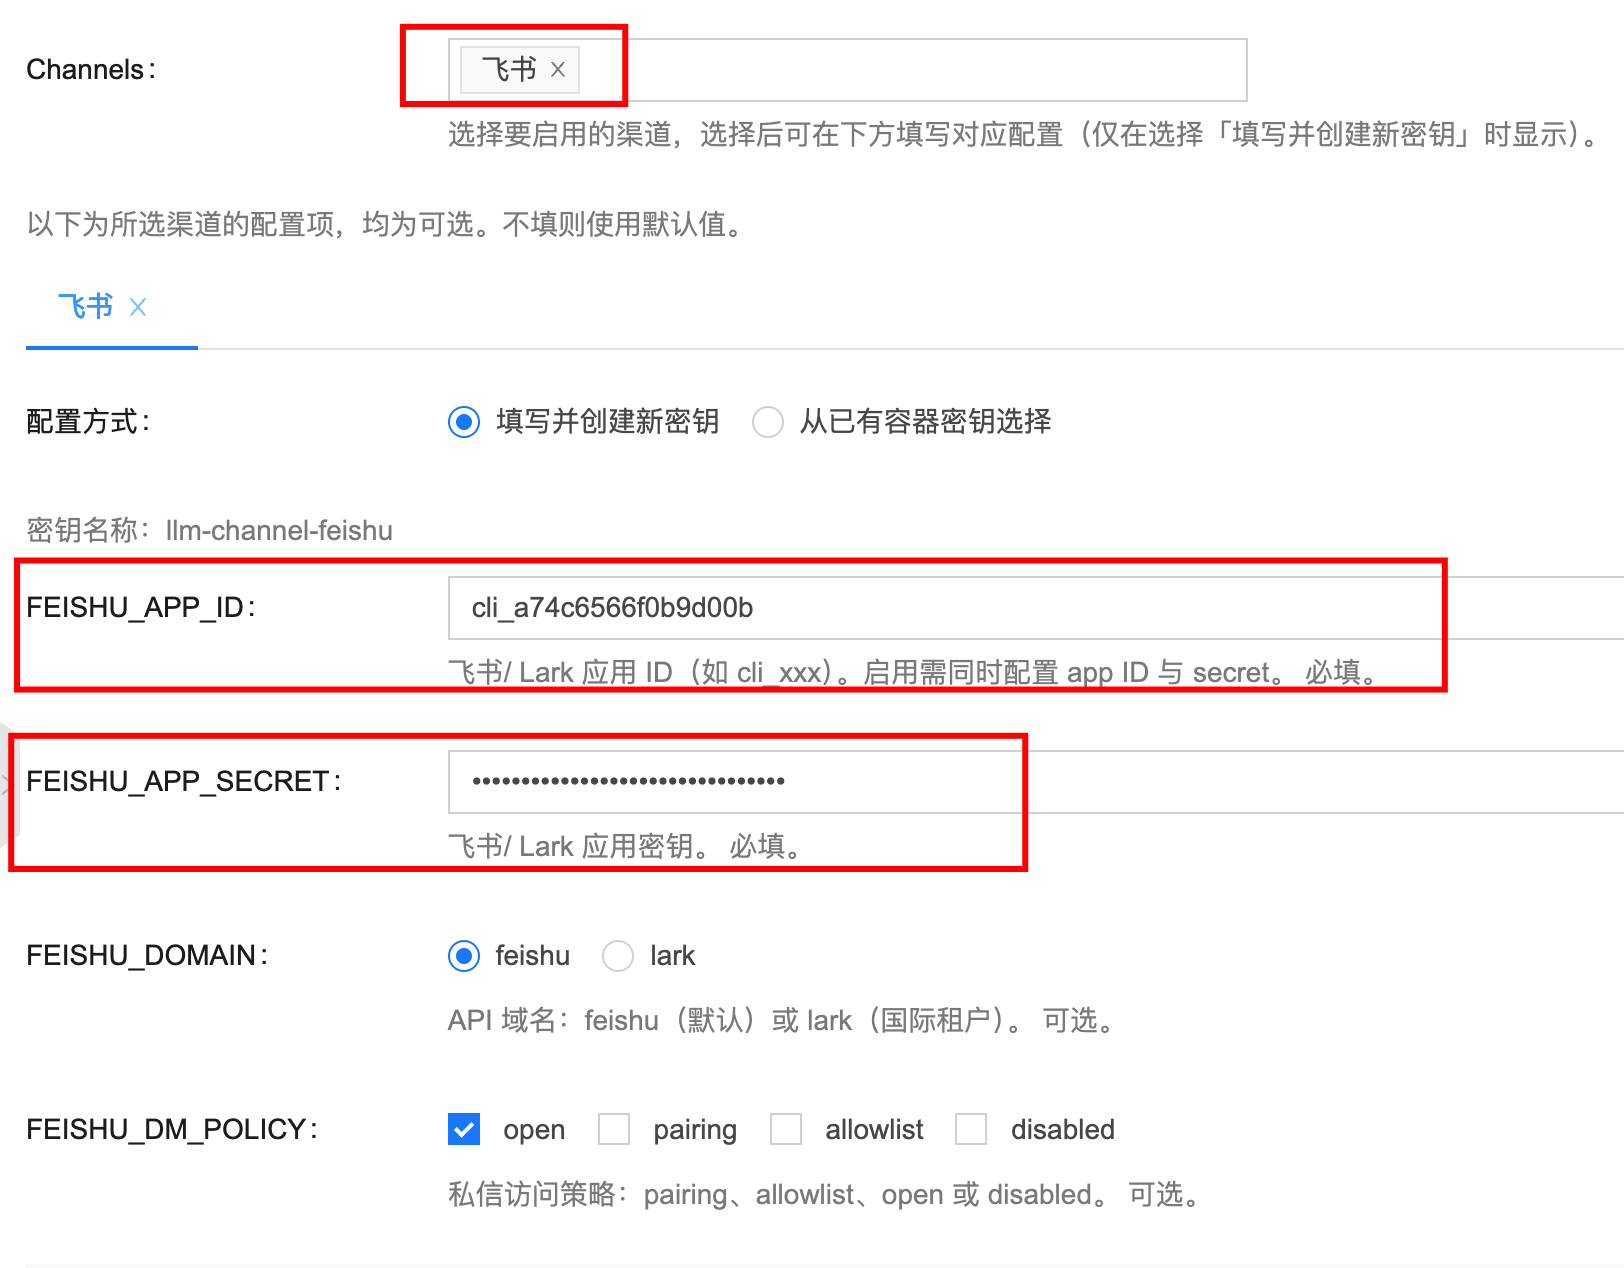
- AppID: corresponds to FEISHU_APP_ID
- AppSecret: corresponds to FEISHU_APP_SECRET
Telegram
Configure the Bot
For Telegram bot configuration, refer to the OpenClaw official documentation: https://docs.openclaw.ai/channels/telegram#quick-setup.
Using BotToken
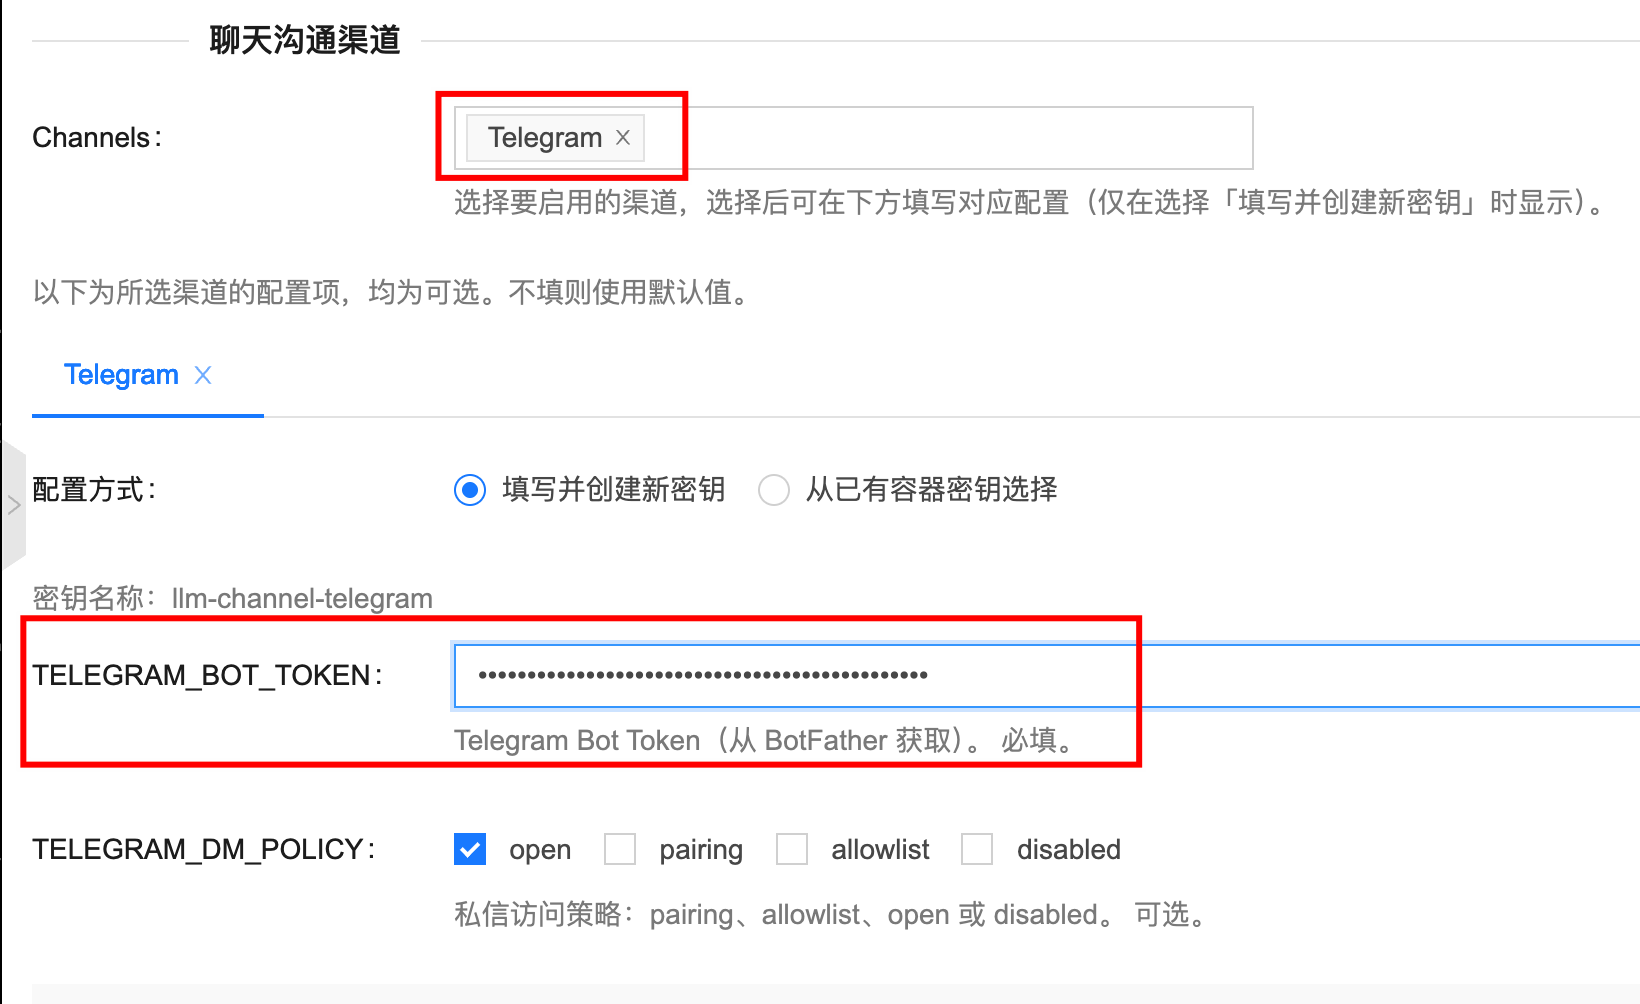
- Copy the bot Token replied by BotFather and fill it in as TELEGRAM_BOT_TOKEN:
Discord
Configure the Bot
For Discord bot configuration, refer to the OpenClaw official documentation: https://docs.openclaw.ai/channels/discord#quick-setup.
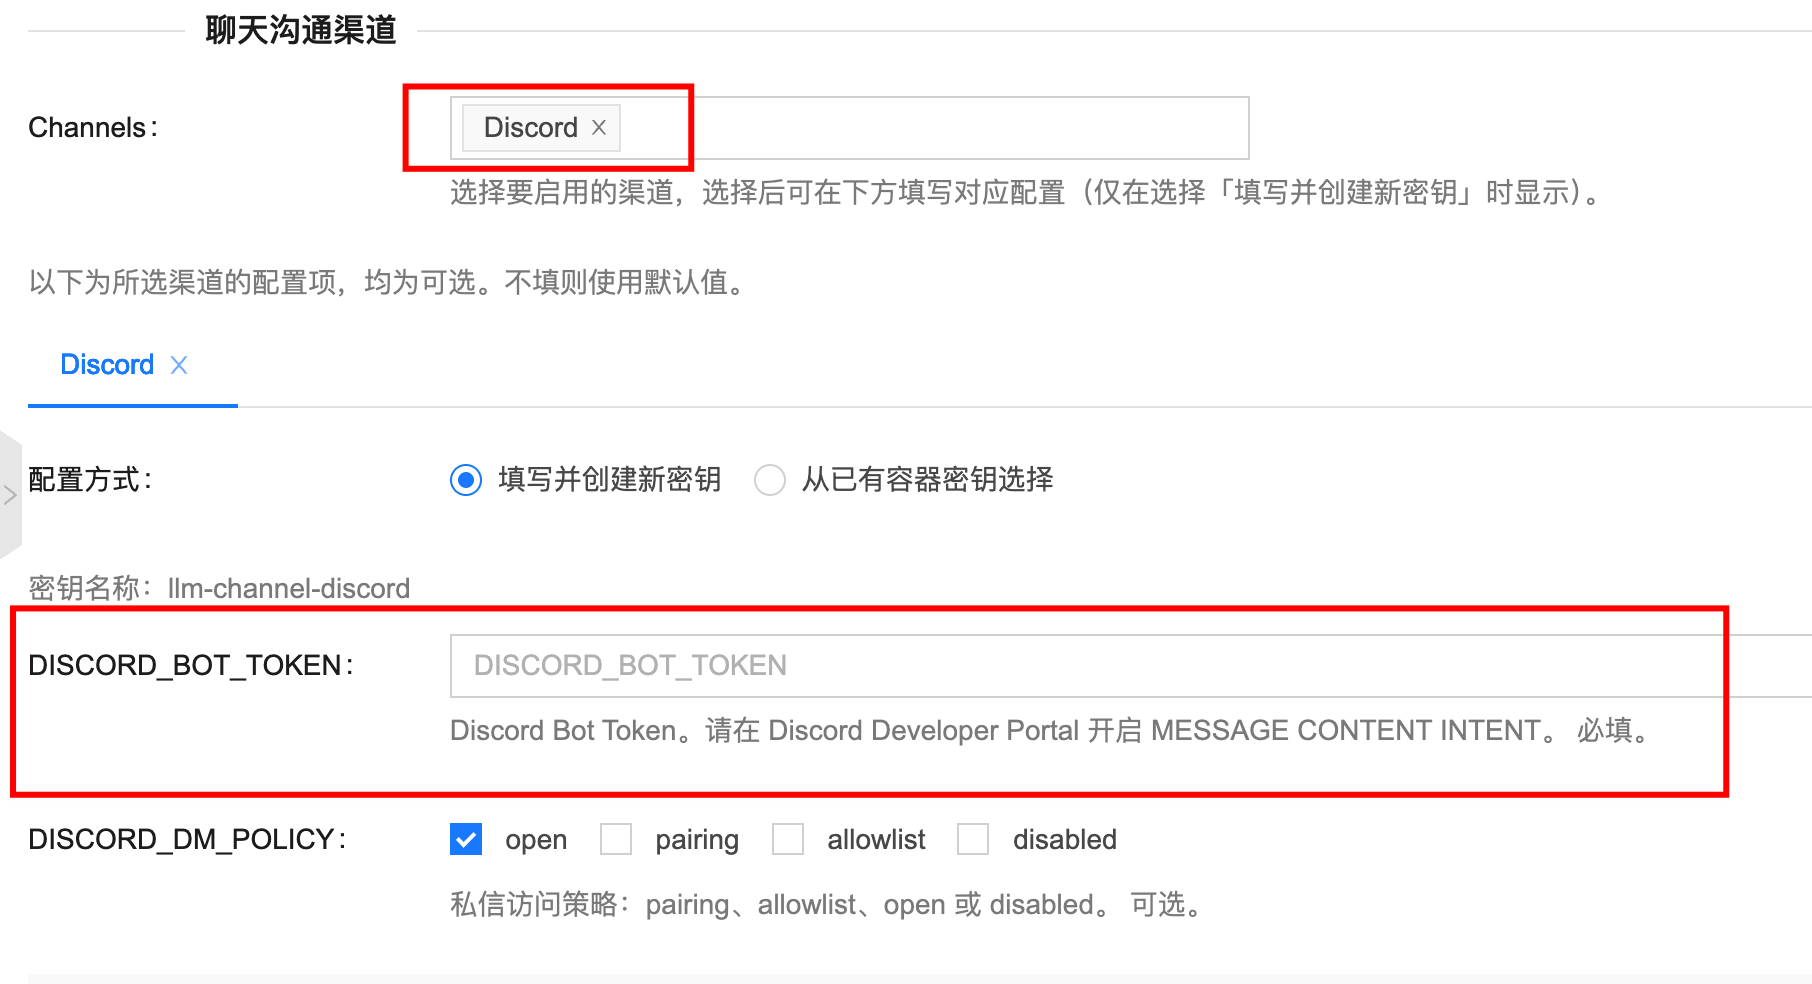
Using BotToken
FAQ
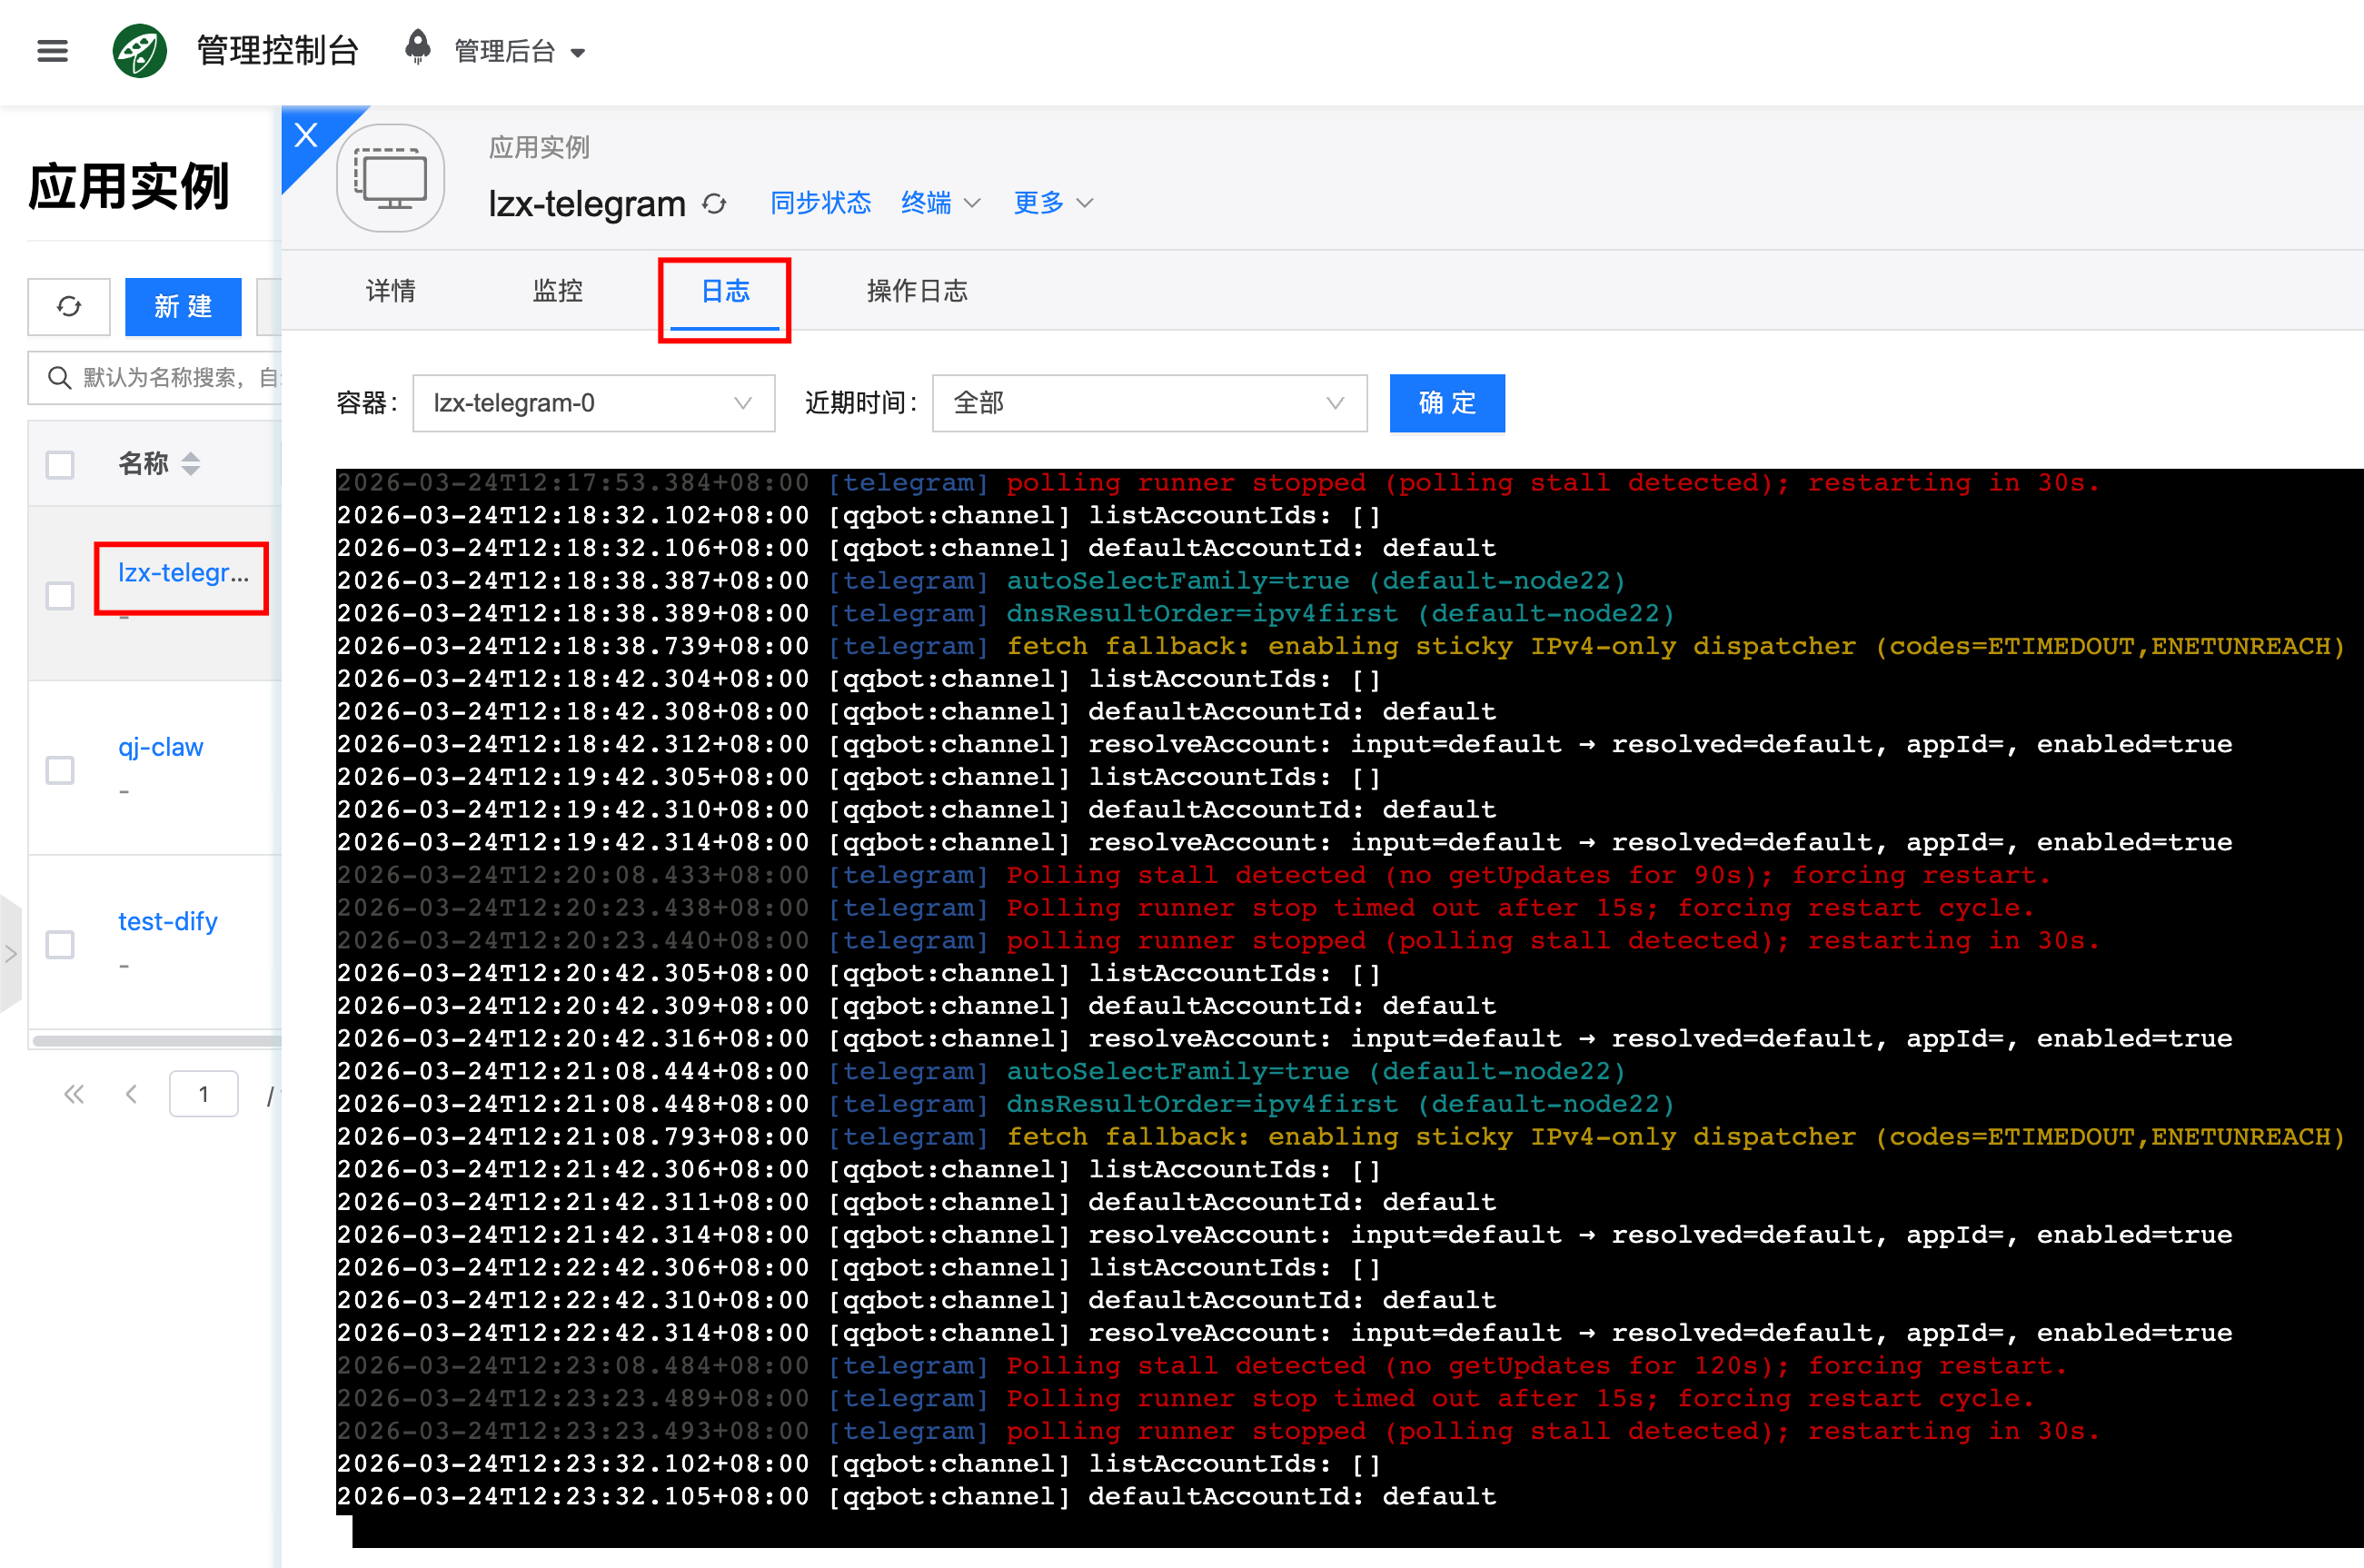
How to view OpenClaw logs?
There are several ways to view OpenClaw service logs:
-
Via the frontend interface: Click the corresponding application instance, go to the details page, then click Logs to view the OpenClaw service output logs, which is useful for troubleshooting.
-
Via accessing the container desktop, open a terminal and run the
openclaw logs --followcommand to view logs.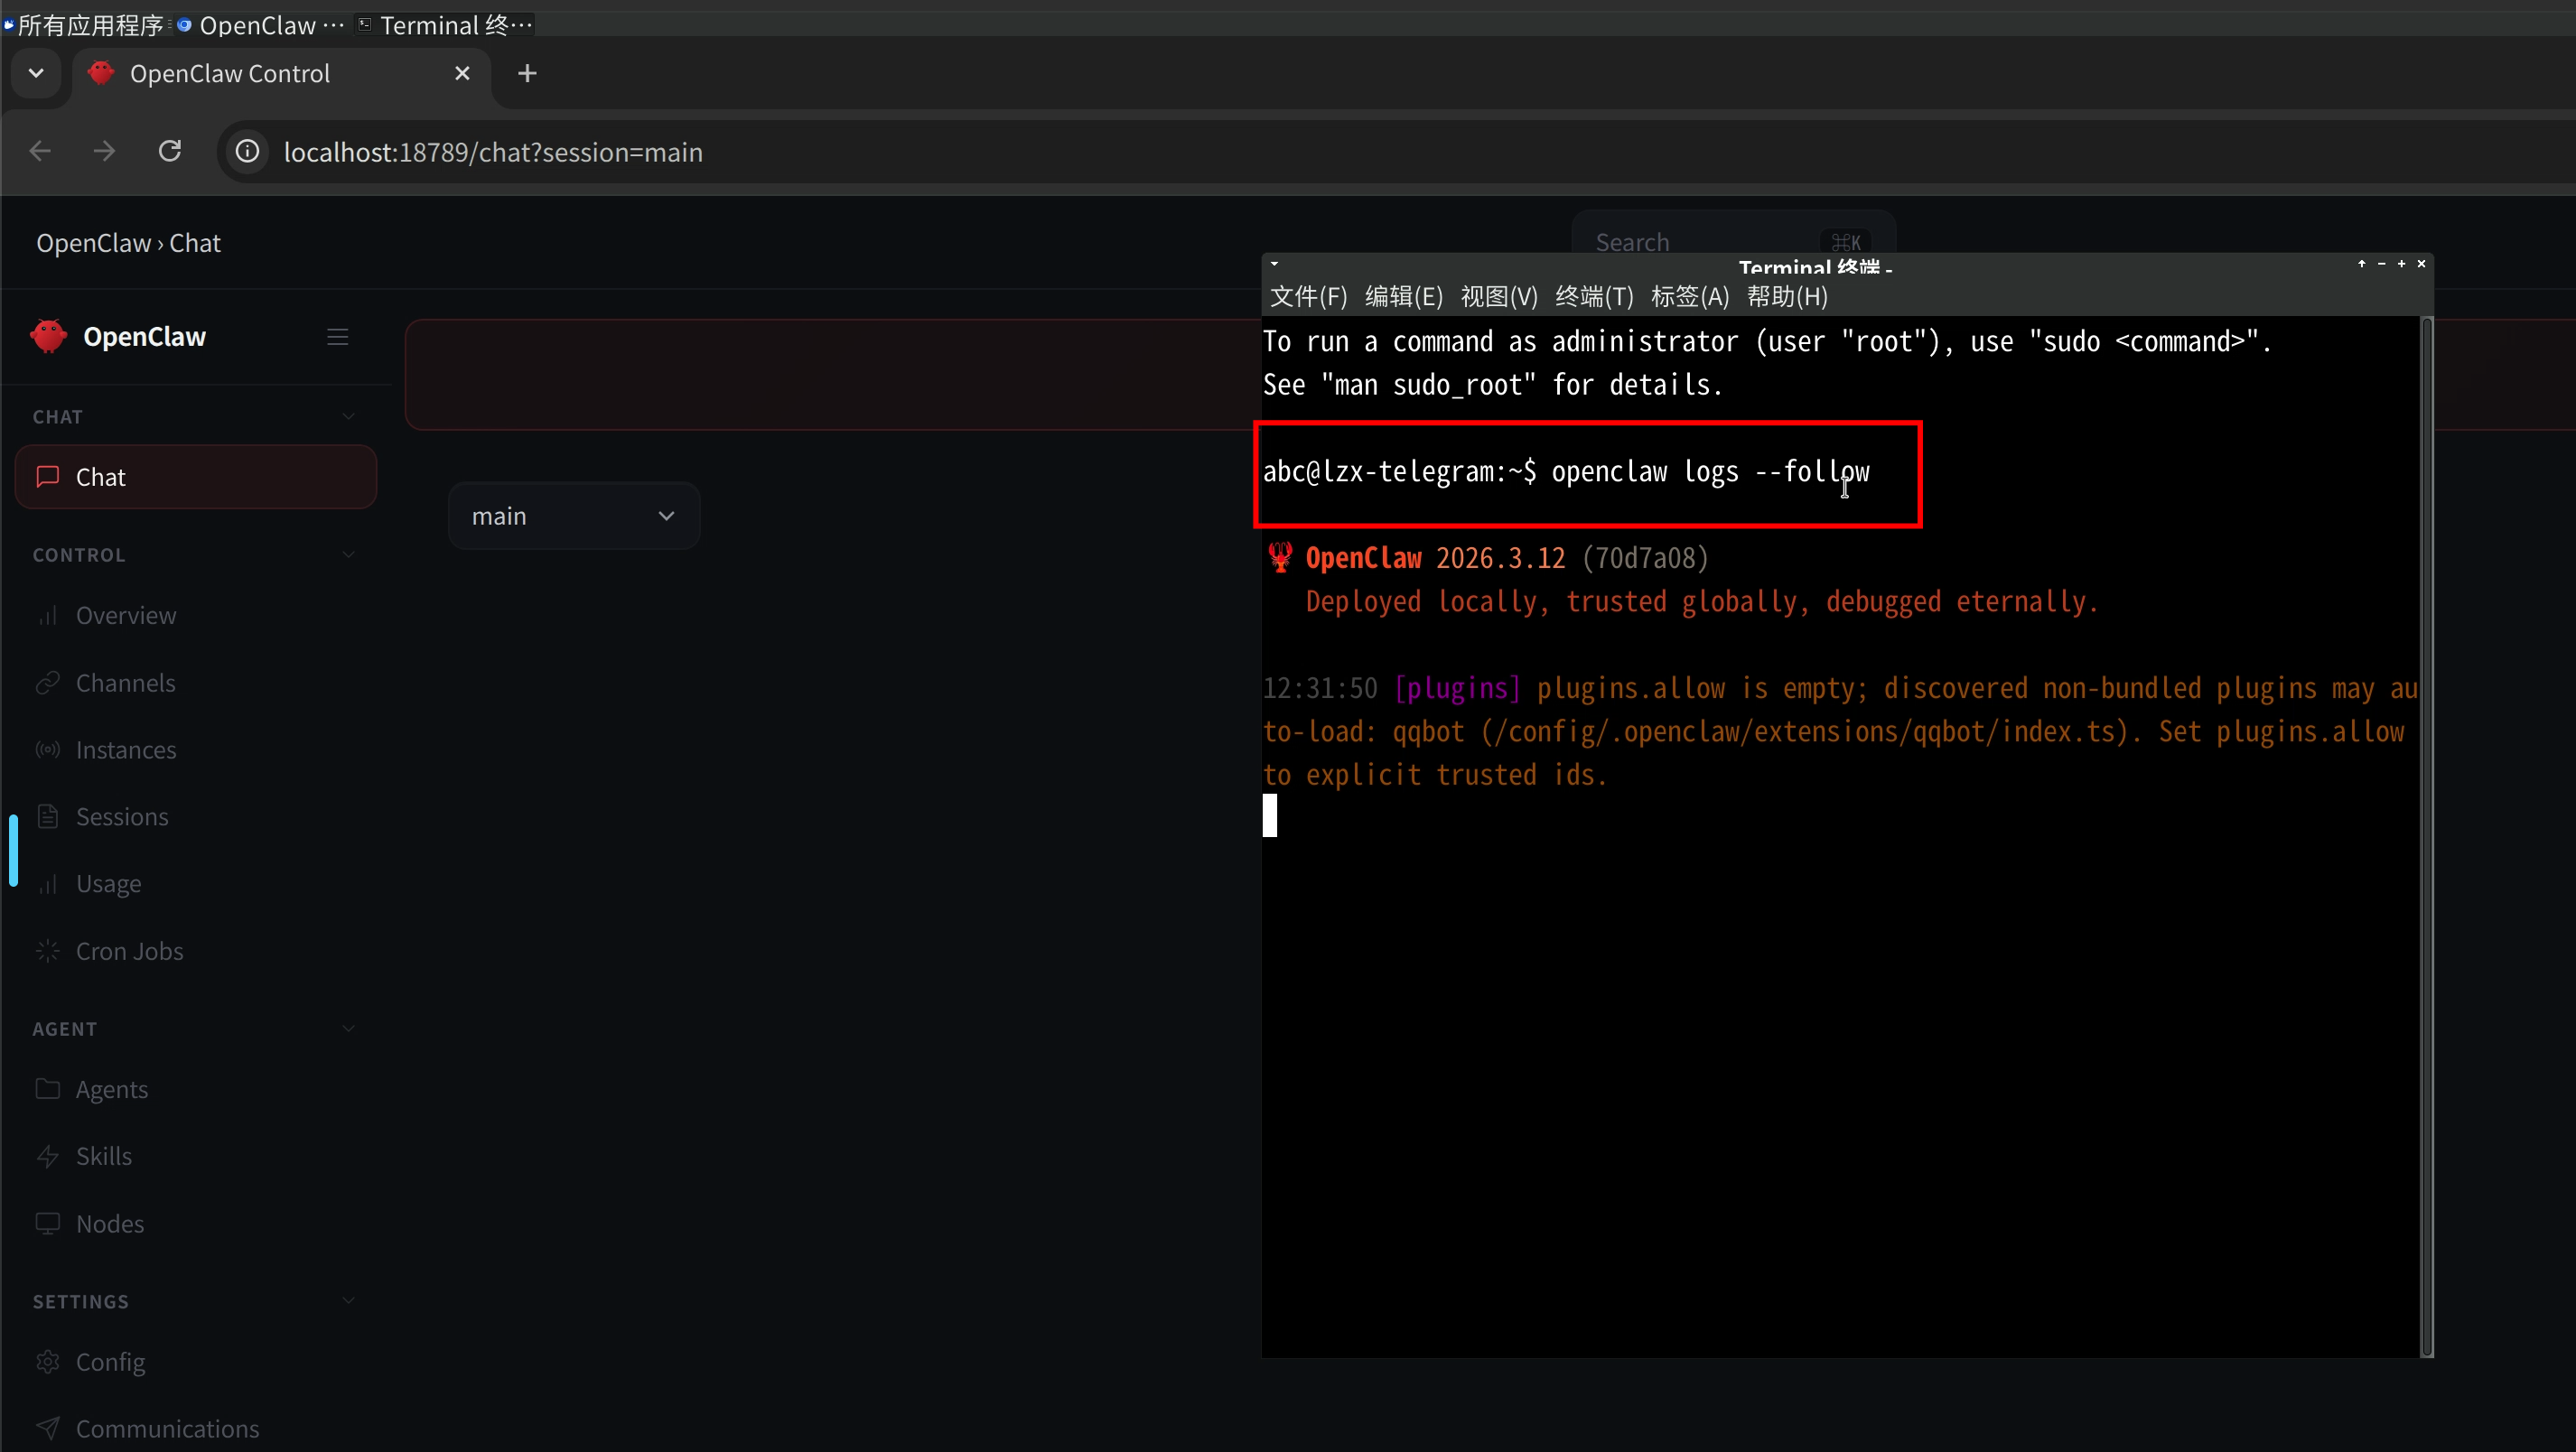
How to log in to the OpenClaw container?
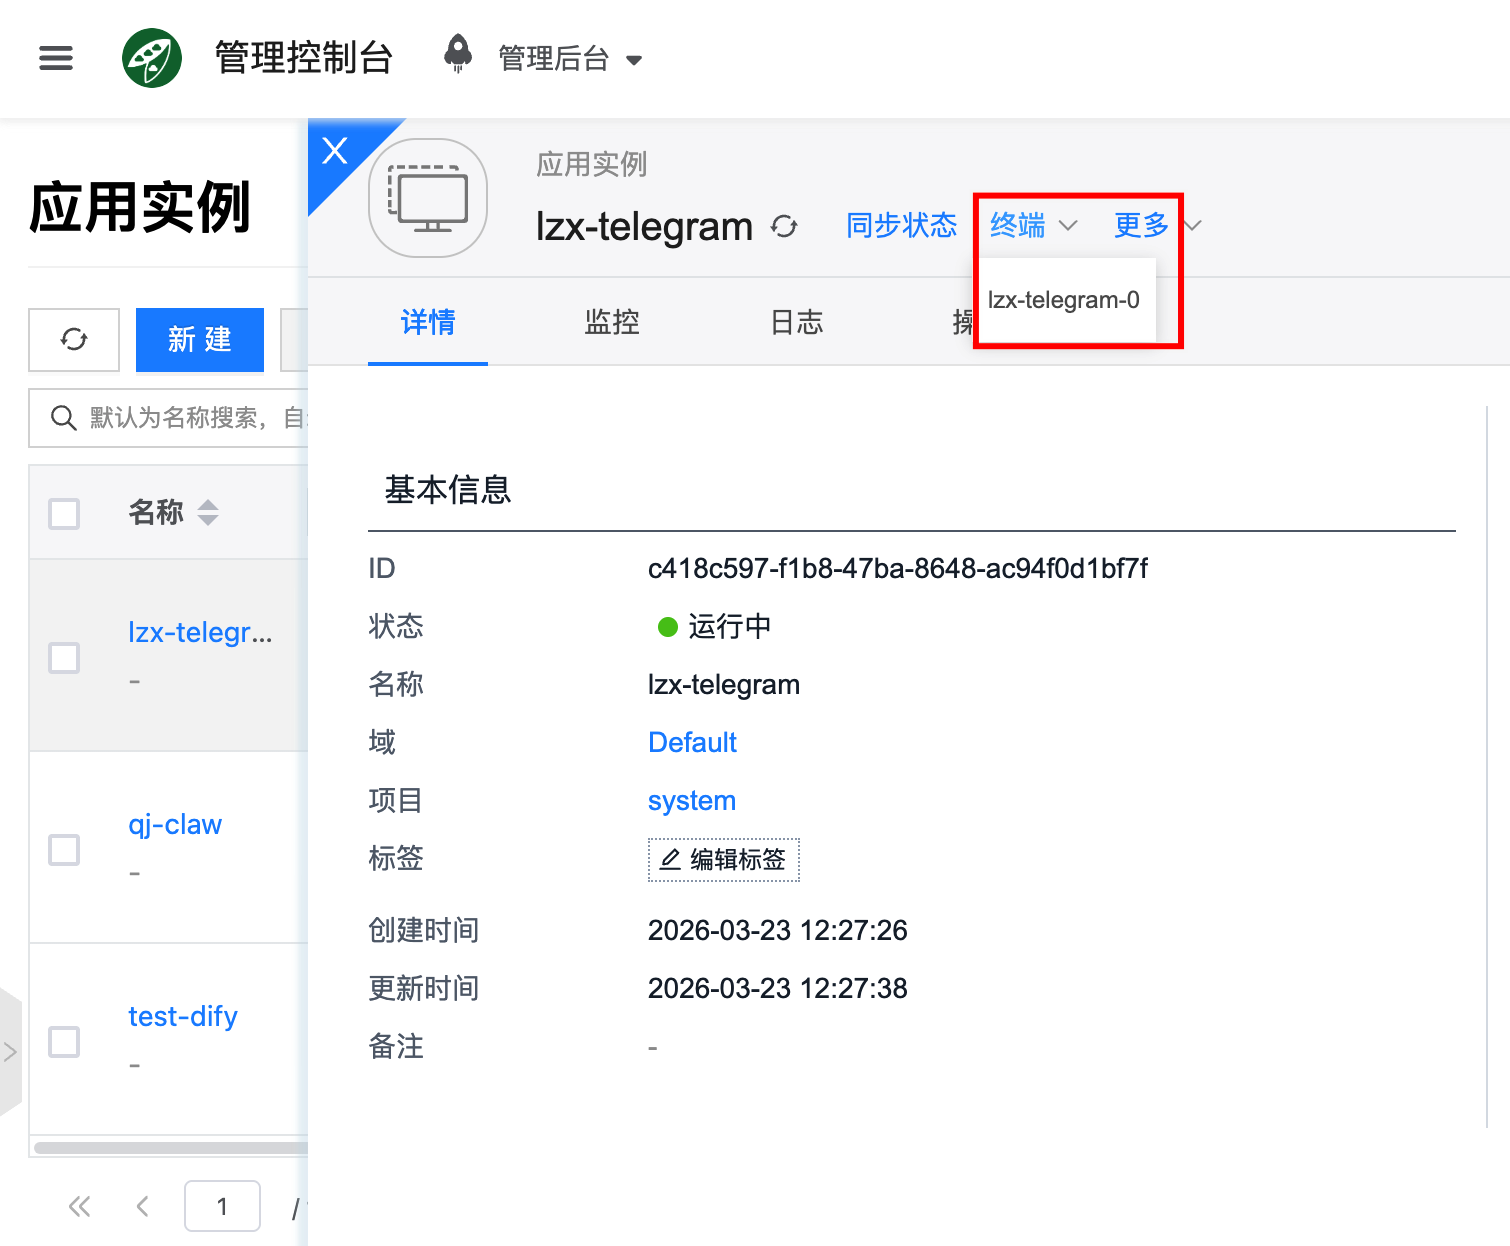
- In addition to accessing the container desktop, you can also enter through the "Terminal" on the details page.
The terminal opened from the frontend defaults to the root user. Running commands carelessly may cause unexpected issues. Make sure you understand the potential side effects before executing any commands.