Recipient Management
This function is used to set users who receive platform message notifications and supports setting multiple notification channels for users to receive messages.
There are two ways to set users as recipients:
- System administrators set users in the system as recipients in recipient management.
- Users modify contact information in user information and enable notification channels, etc.
Entry: In the cloud management platform, click the![]() navigation menu in the upper left corner, and click the "System Configuration/Message Center/Recipient Management" menu item in the pop-up left menu bar to enter the recipient management page.
navigation menu in the upper left corner, and click the "System Configuration/Message Center/Recipient Management" menu item in the pop-up left menu bar to enter the recipient management page.
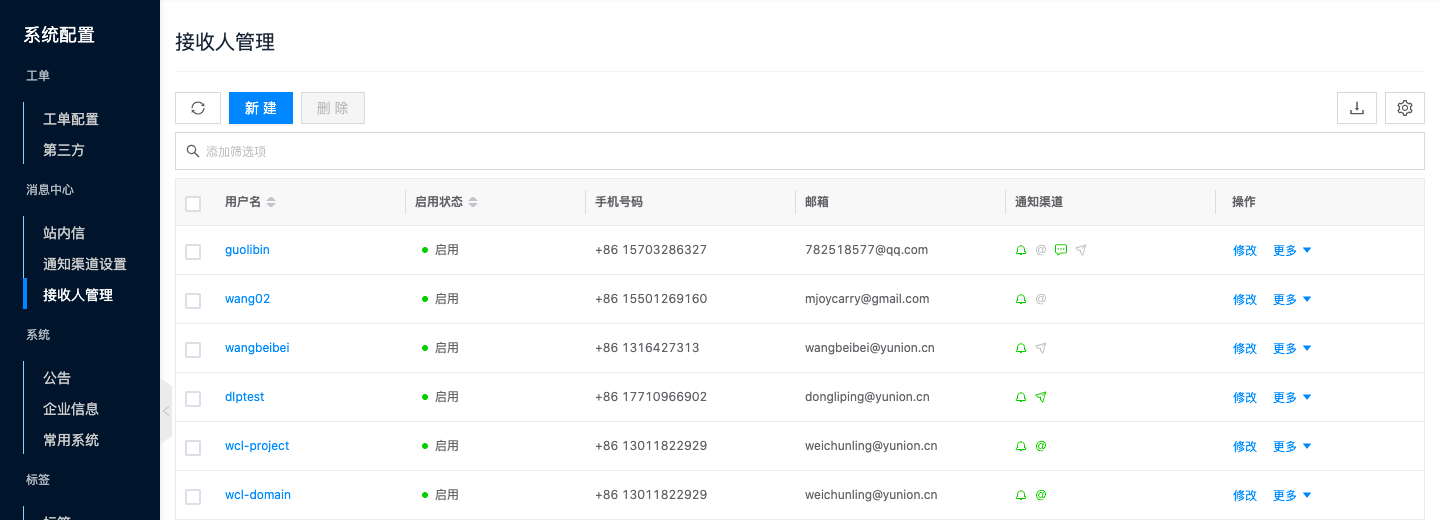
Create Recipient
This function is used for administrators to set users in the system as recipients and set contact information and notification channels for them.
- The notification channels that can be selected when creating recipients are related to the notification channel settings configured by system administrators. For example, if administrators only configure DingTalk and Feishu, only DingTalk and Feishu can be selected in notification channels.
- Supports receiving messages through system internal inbox by default.
- On the contact information page, click the "Create" button above the list to pop up the create contact information dialog.
- Select domain, user (filter optional users by domain), enter phone number, email account, select whether to enable email, SMS, DingTalk, Feishu, Enterprise WeChat, etc., click the "OK" button.
Notification Channel Verification
| Notification Channel | Verification Success | Not Verified or Verification Failed | Verification Steps | Verification Failure Handling Method |
|---|---|---|---|---|
| Users click the email icon in notification channels in user information, send verification email, fill in verification code for verification | ||||
| SMS | Users click the SMS icon in notification channels in user information, send verification SMS, fill in verification code for verification | |||
| Feishu | System automatically verifies | Hover the mouse over the icon to display specific error reasons - Phone number is incorrect, please modify the phone number. - Service exception, please click the icon to verify again. - Notification channel settings are incorrect, please modify in the corresponding platform. | ||
| DingTalk | System automatically verifies | Hover the mouse over the icon to display specific error reasons - Phone number is incorrect, please modify the phone number. - Service exception, please click the icon to verify again. - Notification channel settings are incorrect, please modify in the corresponding platform. | ||
| Enterprise WeChat | System automatically verifies | Hover the mouse over the icon to display specific error reasons - Phone number is incorrect, please modify the phone number. - Service exception, please click the icon to verify again. - Notification channel settings are incorrect, please modify in the corresponding platform. |
In the management console, configuring email and SMS for recipients does not require verification.
Modify Recipient
This function is used to modify recipient contact information and notification channels.
- On the recipient page, click the "Modify" button in the operation column on the right side of the recipient to pop up the modify recipient dialog.
- Modify user's phone number, email account, whether to enable email, SMS, Feishu, DingTalk, Enterprise WeChat, click the "OK" button.
Enable Recipient
This function is used to enable recipients in "Disabled" state. Recipients in enabled state can receive system message notifications.
- Click the "More" button in the operation column on the right side of the recipient in "Disabled" state, select the "Enable" menu item from the dropdown menu to enable the recipient.
Disable Recipient
This function is used to disable recipients in "Enabled" state. After disabling, recipients cannot receive system messages.
- Click the "More" button in the operation column on the right side of the recipient in "Enabled" state, select the "Disable" menu item from the dropdown menu to disable the recipient.
Delete Recipient
This function is used to delete recipients.
Single Delete
- On the recipient page, click the "Delete" button in the operation column on the right side of the recipient to pop up the operation confirmation dialog.
- Click the "OK" button to complete the operation.
Batch Delete
- Select one or more user recipients in the recipient list, click the "Delete" button above the list to pop up the operation confirmation dialog.
- Click the "OK" button to complete the operation.
View Recipient Details
This function is used to view detailed information about user recipients.
- On the recipient page, click the recipient name item to enter the recipient details page.
- The menu items at the top of the details page support management operations on recipients.
- View user recipient's cloud ID, ID, name, enable status, SMS, email, notification channels, creation time, etc.
View Operation Logs
This function is used to view operation log information related to recipients.
- On the recipient details page, click the "Operation Logs" tab to enter the operation logs page.
- Load More Logs: The list displays 20 operation log entries by default. To view more operation logs, click the "Load More" button to get more log information.
- View Log Details: Click the "View" button in the operation column on the right side of the operation log to view the log's detailed information. Supports copying detail content.
- View Logs for a Specific Time Period: To view operation logs for a certain time period, set specific dates in the start date and end date in the upper right corner of the list to query log information for the specified time period.
- Export Logs: Currently only supports exporting logs displayed on this page. Click the
 icon in the upper right corner, set the export data columns in the pop-up export data dialog, click the "OK" button to export logs.