Ollama
Ollama is a lightweight local LLM inference service that requires a GPU, suitable for quick validation and small-scale inference scenarios.
Quick Start
Creating an Ollama inference instance generally involves the following steps:
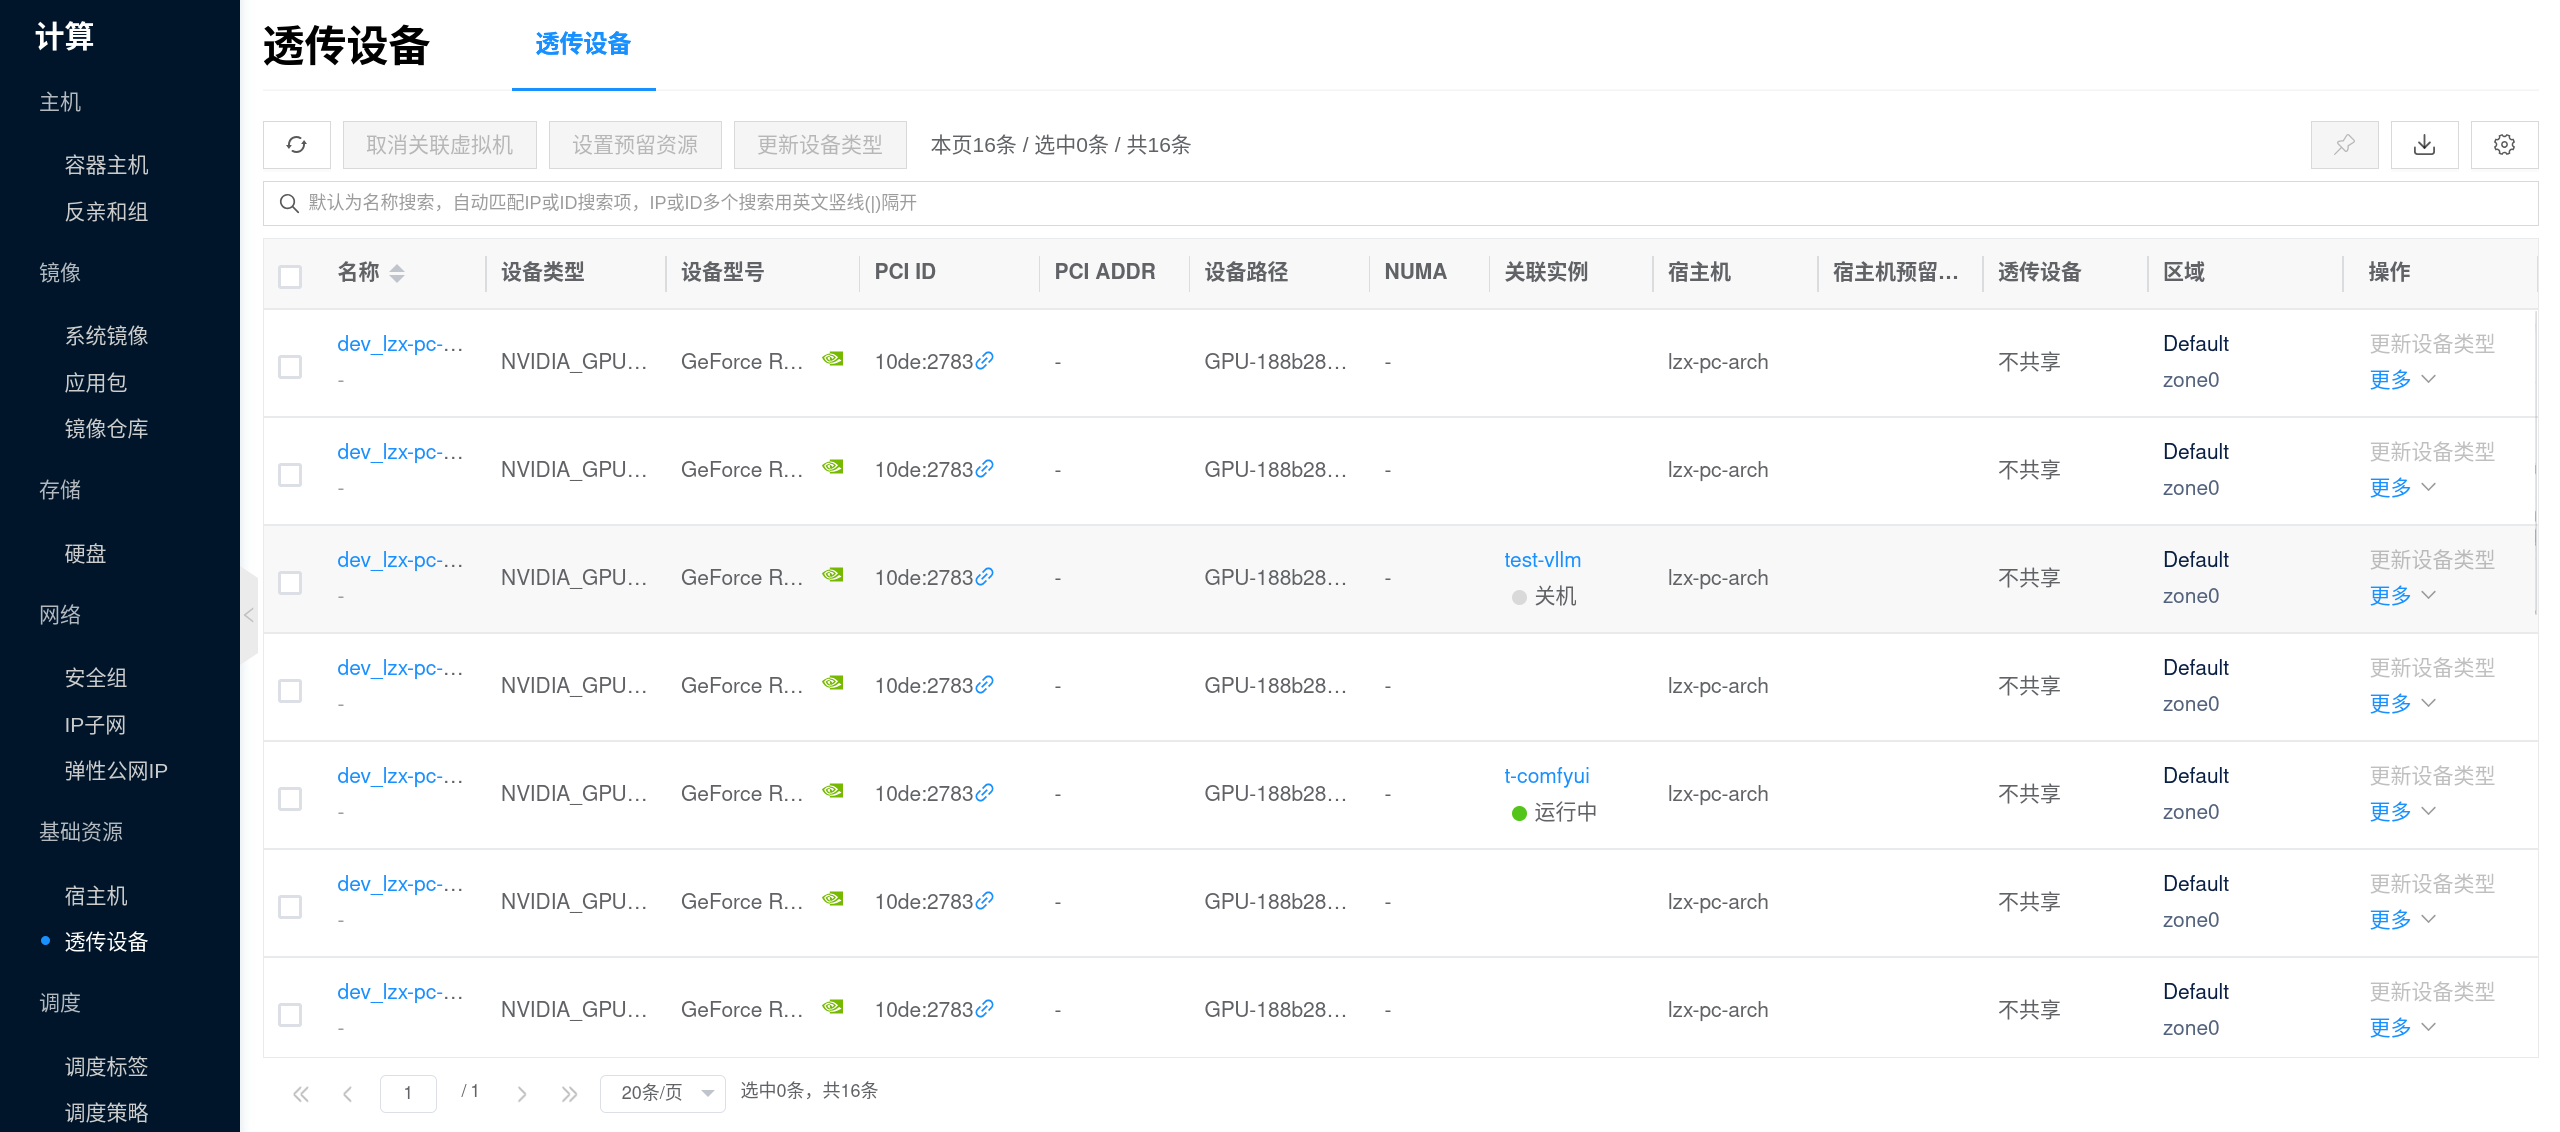
- Prepare GPU Environment: Complete the NVIDIA and CUDA Environment Setup, and prepare sufficient persistent storage for model caching.
- Assign GPU to Plan: Go to Inference Templates to configure GPU, CPU, memory, and data disk for the Ollama plan template; the platform usually provides default templates, but you can also create or edit them as needed.
- Create Inference Instance: In the console, go to AI > Inference > Inference Instances, click New, and select an Ollama inference template with GPU configured to create the instance.
- Select Model (Optional): If the Inference Model Library already has the target model, you can select it directly in the template or instance parameters; if no models are available yet, you can create the instance first and then manually pull models via
ollama pull. - Get Service Address and Verify: Go to the instance details page "Connection Info" to get the inference service address; check the running status and logs to confirm the model has loaded successfully and is ready to serve inference requests (refer to the connection info and image documentation for specific invocation methods).
1. Prepare GPU Environment
Ollama relies on GPU for inference. Please first complete the NVIDIA and CUDA Environment Setup, and confirm the following:
- The node can detect the GPU and the driver status is normal.
- The target GPU has enough VRAM to accommodate the model you plan to run.
- Data disk space is sufficient, as Ollama model files are cached in
/root/.ollama/modelsinside the container, and the platform will mount this directory to persistent storage. - If you plan to pull models online, verify network connectivity from the node to the model source in advance.
You can run the following commands on the GPU node for a basic check:
nvidia-smi
curl -I https://registry.ollama.ai
If you plan to mount multiple models, it is recommended to plan the data disk capacity before creating the template. Ollama's model layer files, manifests, and subsequent caches will continuously consume disk space.
2. Assign GPU to Plan
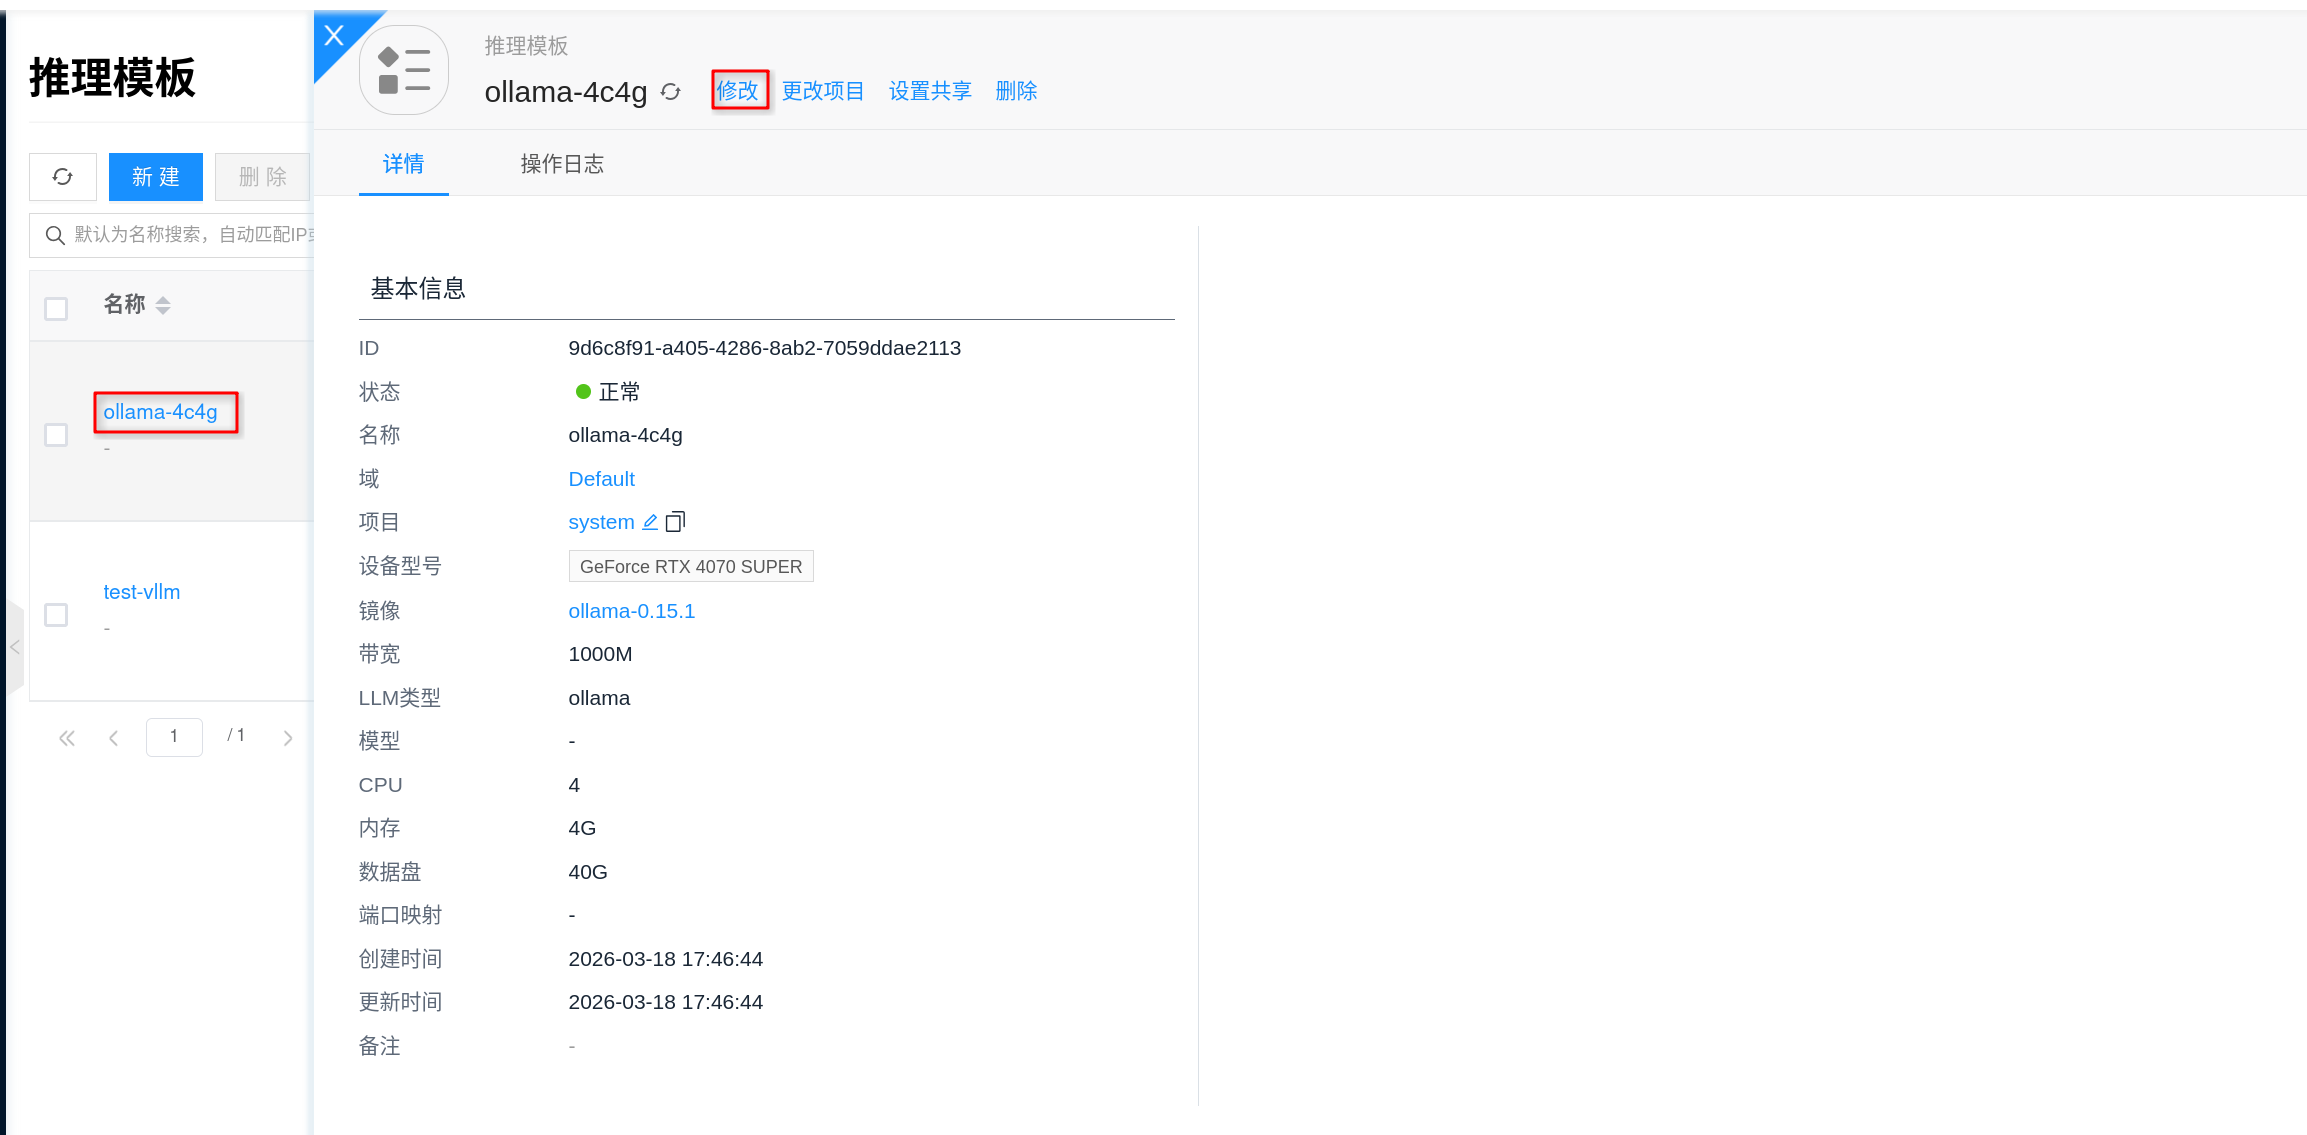
Before creating an instance, it is recommended to go to AI > Inference > Inference Templates and configure the template specifications for the Ollama plan. The "plan" here can be understood as the resource specification to be selected when creating an instance: configure GPU, CPU, memory, and data disk first, then return to the instance page to create.
- Go to AI > Inference > Inference Templates in the console.
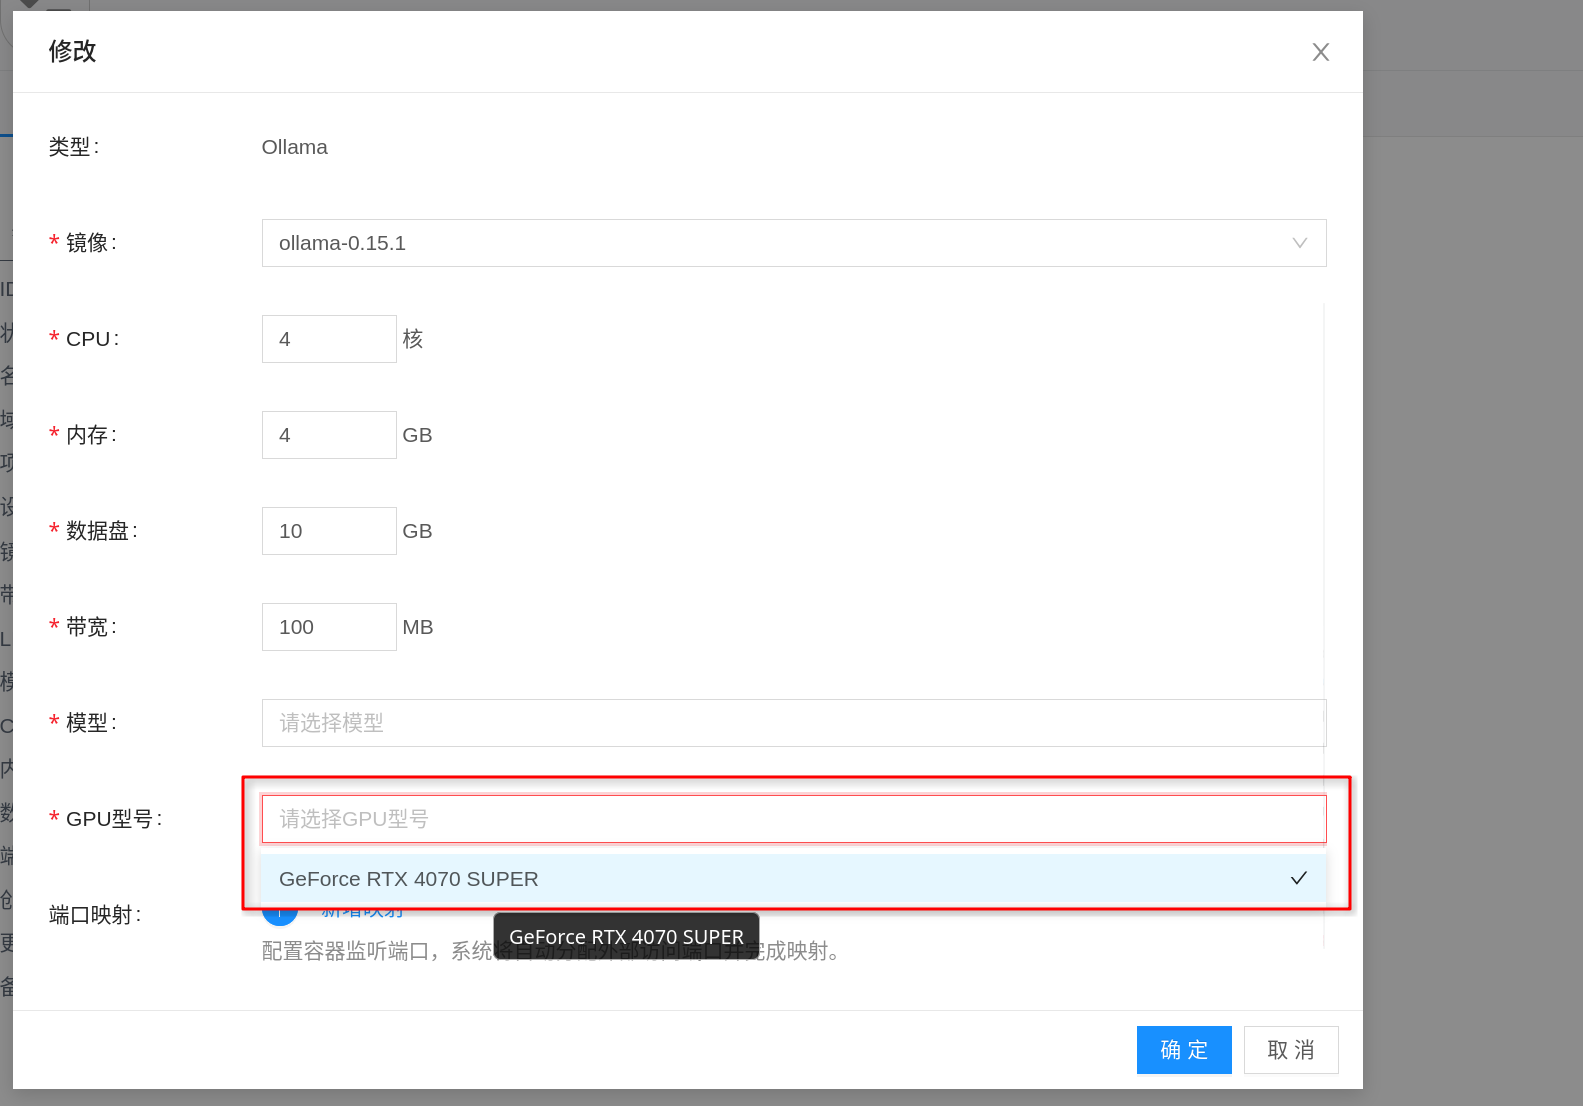
- Select an existing Ollama template and click Edit, or click New to create an
Ollamainference template. - In the specification configuration, select an appropriate GPU model for the plan, and confirm CPU, memory, and data disk size accordingly.
- Select the corresponding AI Image in the image field, and save the template.
When assigning GPU to the plan, focus on:
- GPU VRAM: This is the key metric for whether Ollama can successfully load a model; prioritize selection based on the target model size.
- CPU / Memory: Affects request processing, queuing, and model running stability; even when VRAM is sufficient, insufficient CPU and memory can still cause startup failure or slow responses.
- Data Disk: Model files are persisted to
/root/.ollama/models; a disk that is too small will cause model download failures, upgrade difficulties, or cache overflow. - Image Version: Prefer Ollama images verified by the platform, and try to pin a specific version for easier upgrades and rollbacks.
If you want downloaded models to persist after instance restarts, make sure to use a template with a persistent data disk; the platform will mount Ollama's model directory to persistent storage rather than relying on the container's ephemeral layer.
3. Select Model (Optional)
If the model-related fields on the template or instance page already have the target model available, it is recommended to select it directly. This way, after instance creation, you can usually see the corresponding model in Ollama directly, reducing manual download steps.
The recommended workflow is:
- Prepare the target model in the Inference Model Library first.
- Return to the Inference Template or instance creation page and select the model version to mount.
- After creation, run
ollama listin the instance terminal to confirm the model has been loaded into the current instance.
If there are no available models in the model library yet, it does not affect continued use of Ollama. You can create the instance first, and after it is running, enter the terminal and manually pull models via ollama pull. For example:
ollama pull qwen2.5:7b
After pulling is complete, run the following command to confirm the model has been downloaded locally:
ollama list
If you are just temporarily validating a model, using ollama pull directly is quicker; if you later want multiple Ollama instances to reuse the same model, it is recommended to save verified models to the Inference Model Library for centralized management.
4. Create Inference Instance
The console entry is AI > Inference > Inference Instances.
- Click New.
- Select an
Ollamainference template or instance type with GPU configured. - Fill in the instance name and select project, region, network, and other general configurations as required by the page.
- In the model, mount model, or model version fields on the page, if there is a target model available, you can select it directly; if no models are currently available, you can leave it empty and submit to create.
If there are no available Ollama templates in the console, you can first go to AI > Inference > Inference Templates to create or edit a template, then return to the instance page to create.

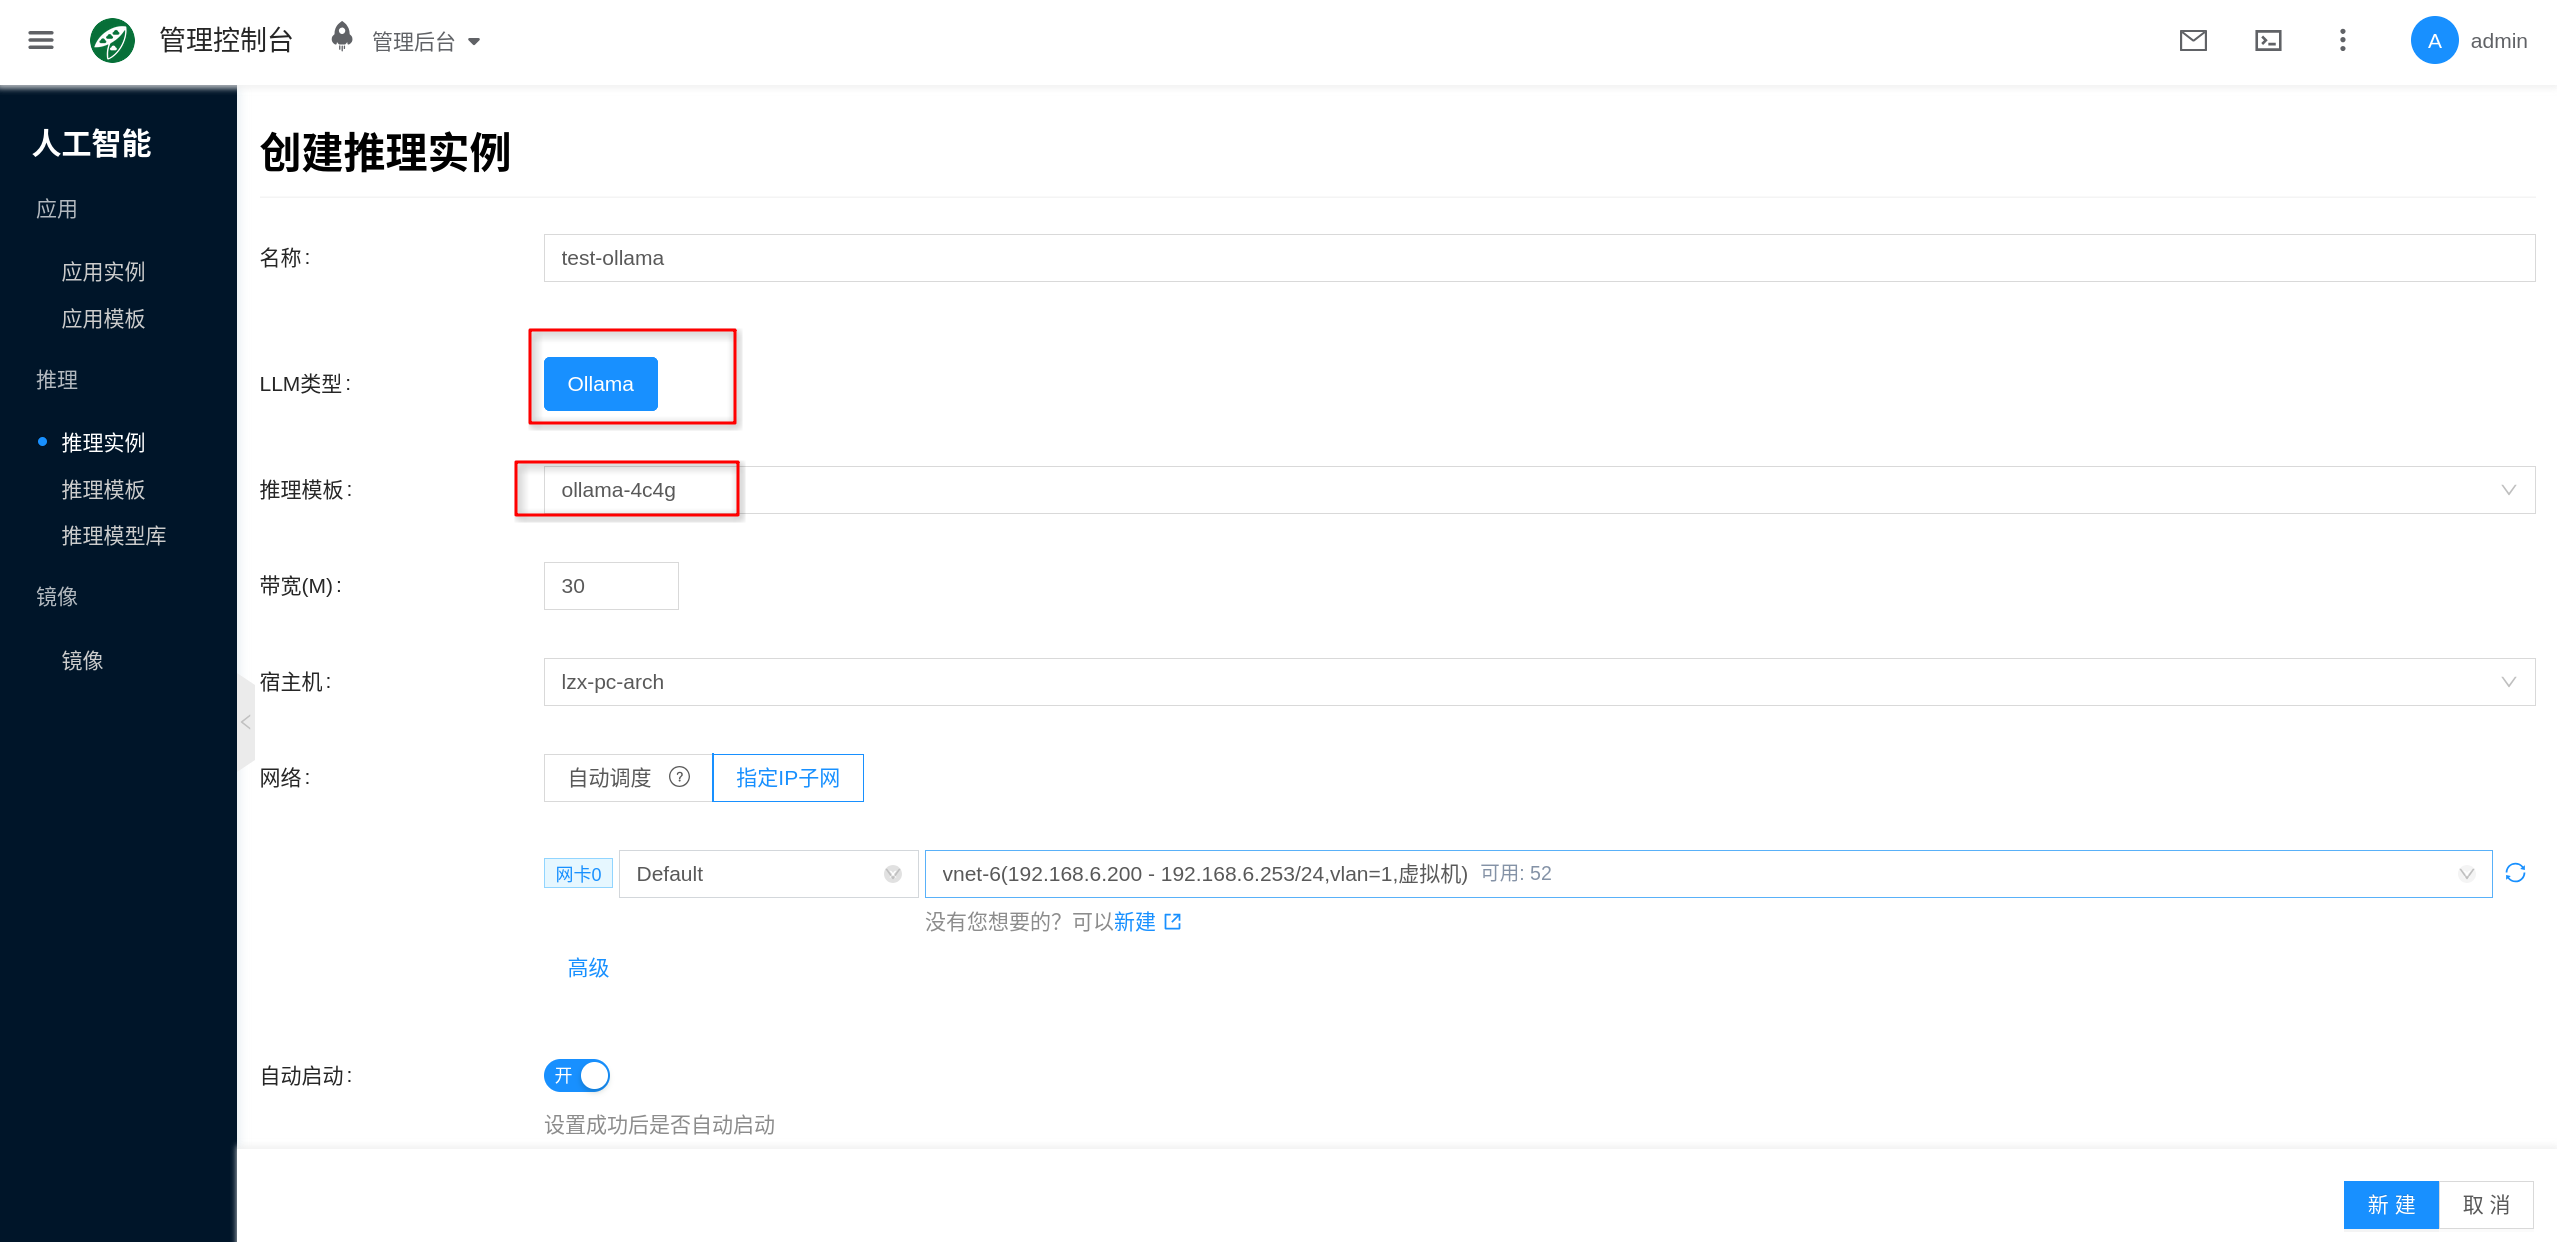
The bandwidth, host, network, and other fields on the page can be configured based on your actual scenario:
- Bandwidth: Used to limit container network bandwidth; fill in based on business traffic volume.
- Host (Optional): If you need to pin the instance to a specific GPU node, you can specify it manually; otherwise, let the platform schedule automatically.
- Network: You can use automatic allocation or specify an existing IP subnet.
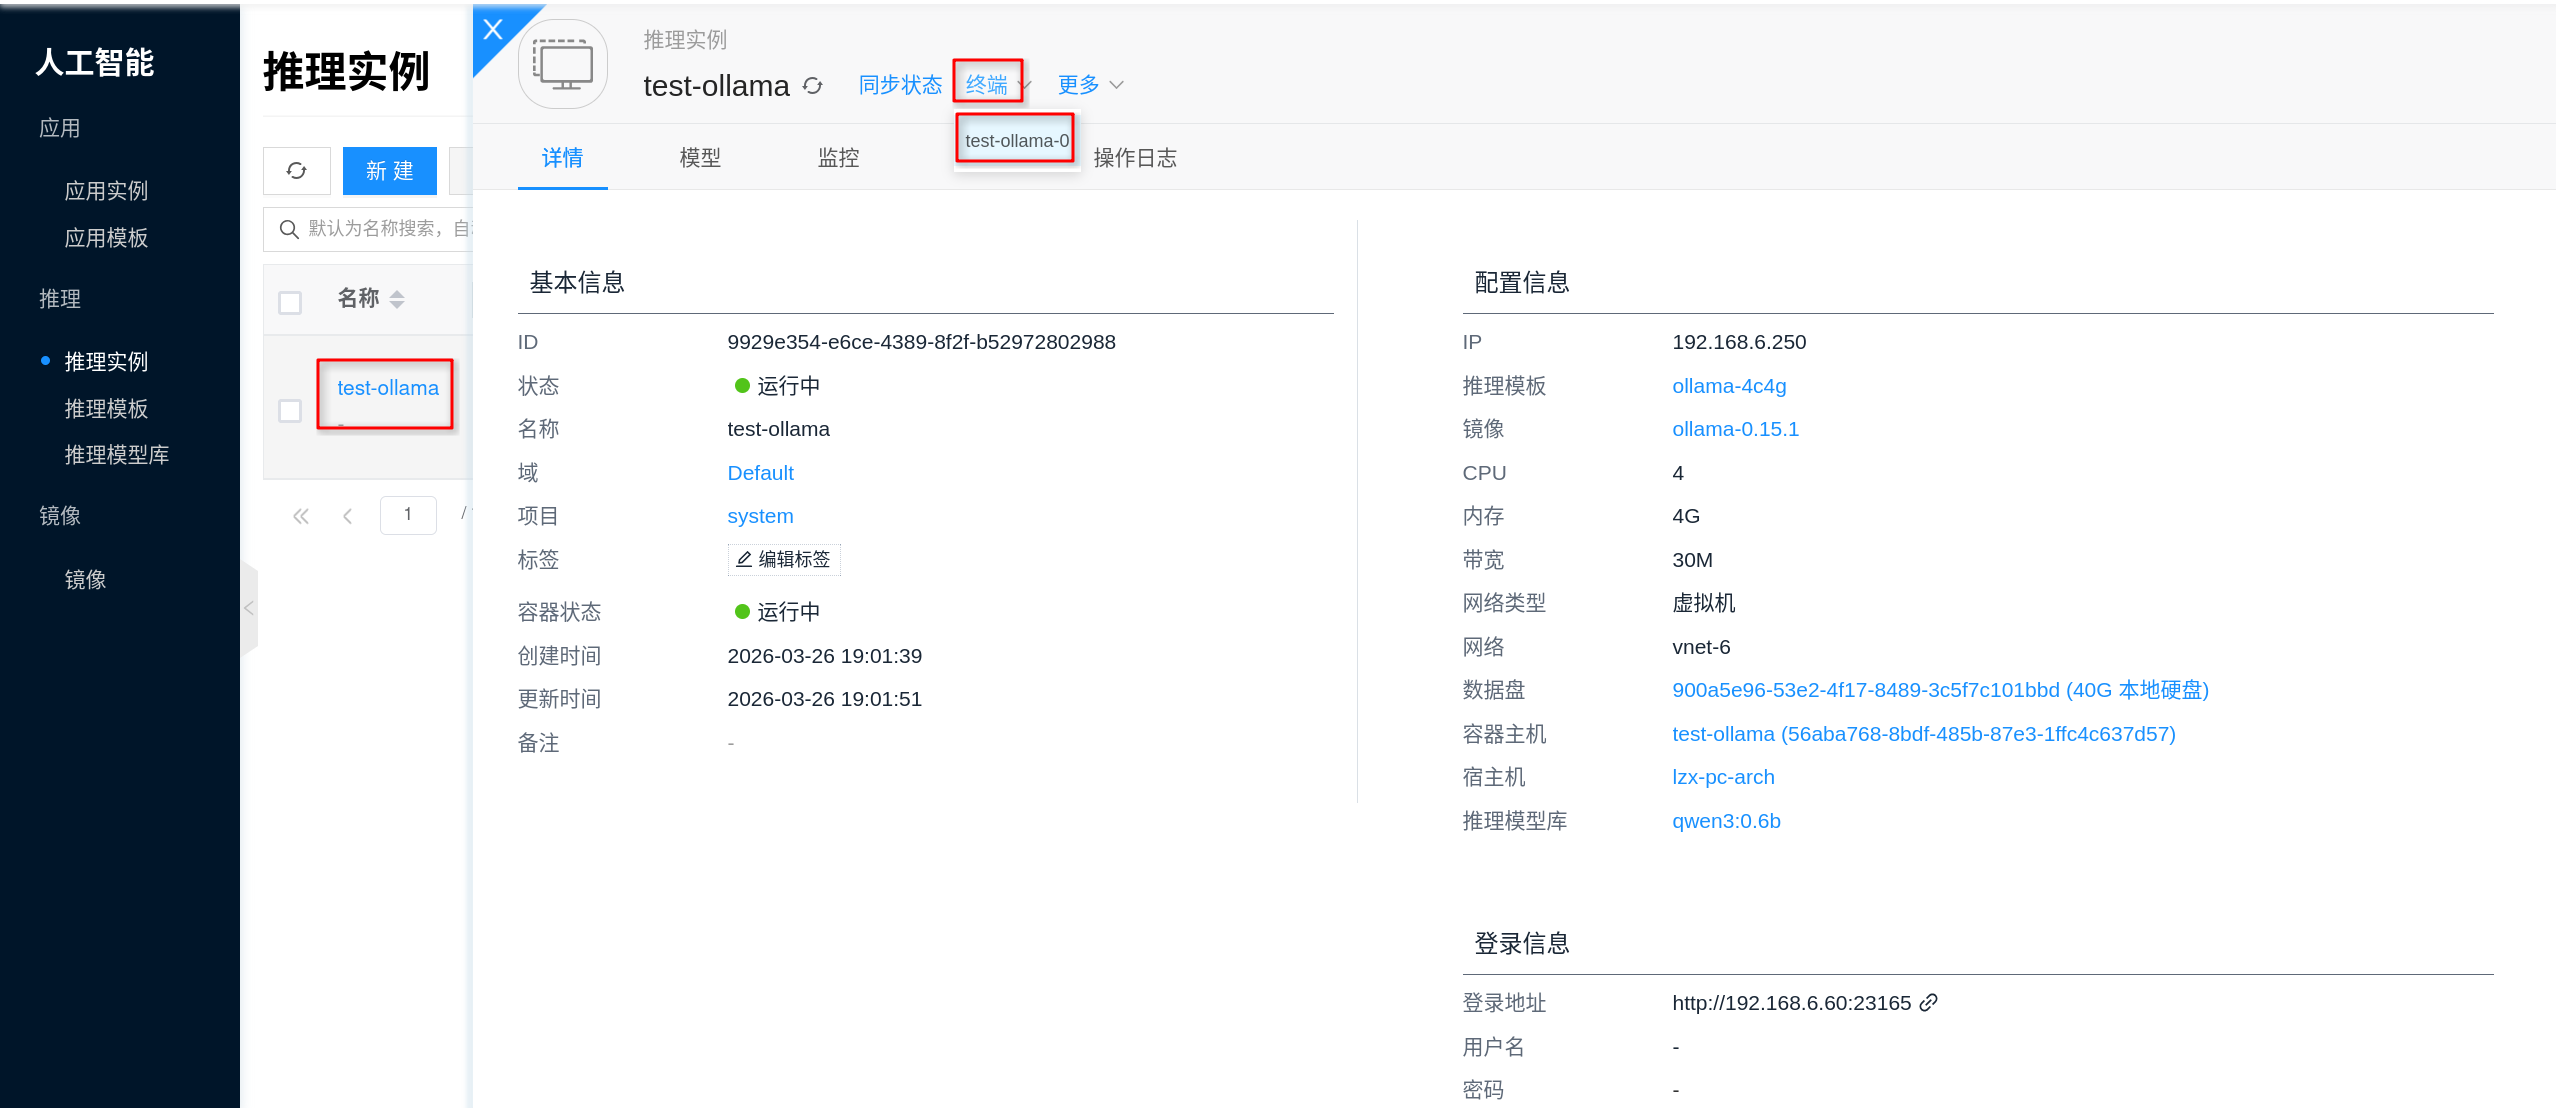
5. Get Service Address and Verify
After the instance is created successfully, go to the instance details page, open Connection Info, and you can get the Ollama service address. Based on the current platform implementation, the Ollama service listens on port 11434 by default, and is typically accessible via http://<instance-IP>:11434.

It is recommended to verify in the following order:
- First confirm that the instance status is "Running".
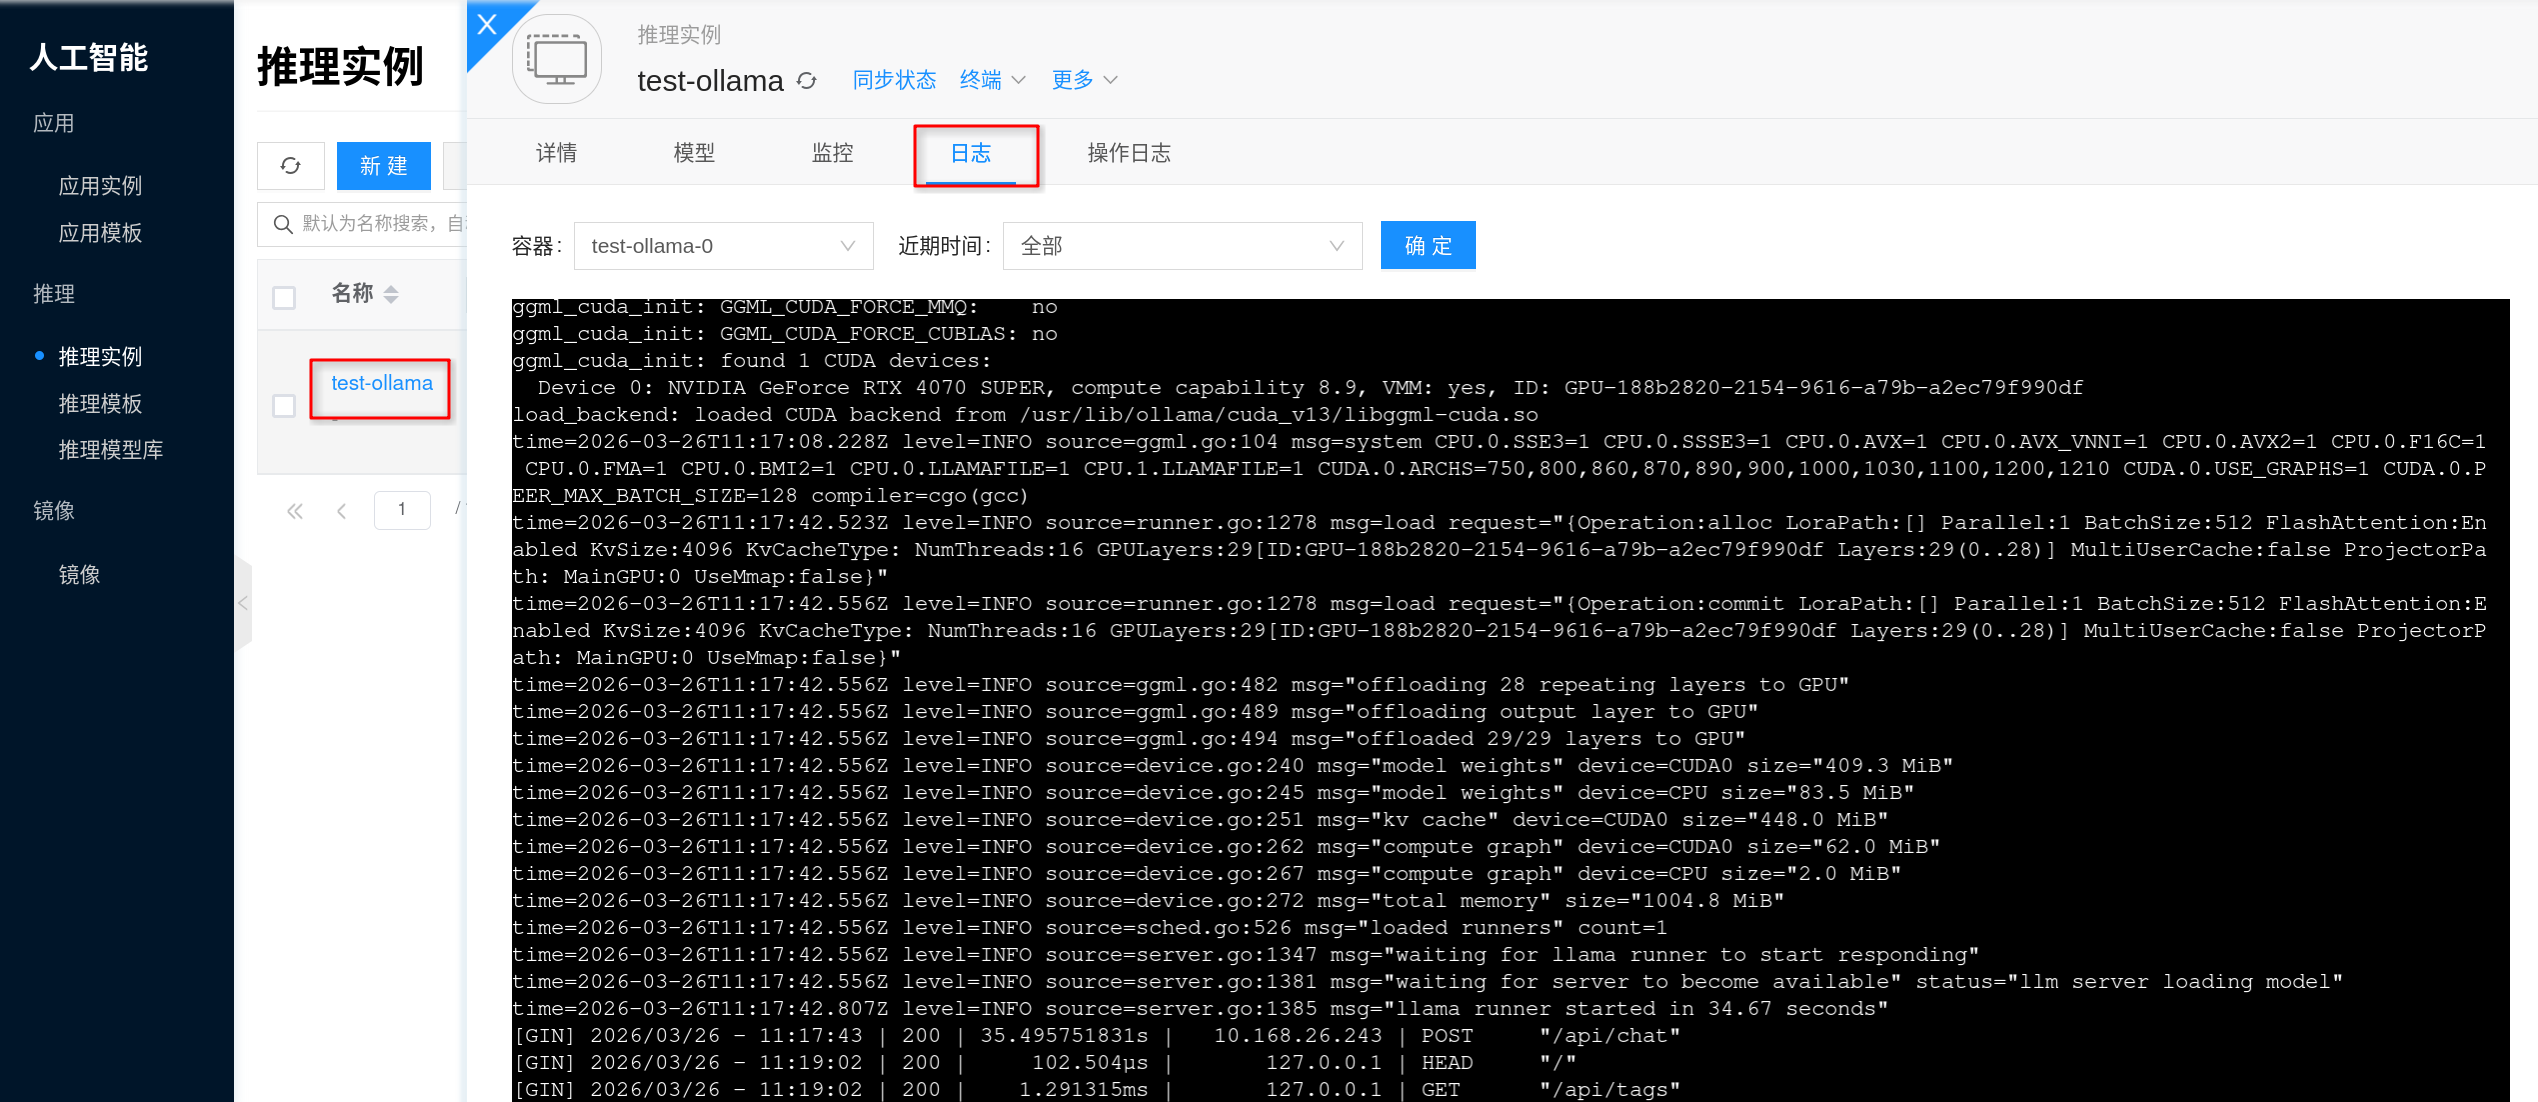
- Open the Logs on the details page to confirm there are no errors such as model loading failure, insufficient VRAM, or download failure.
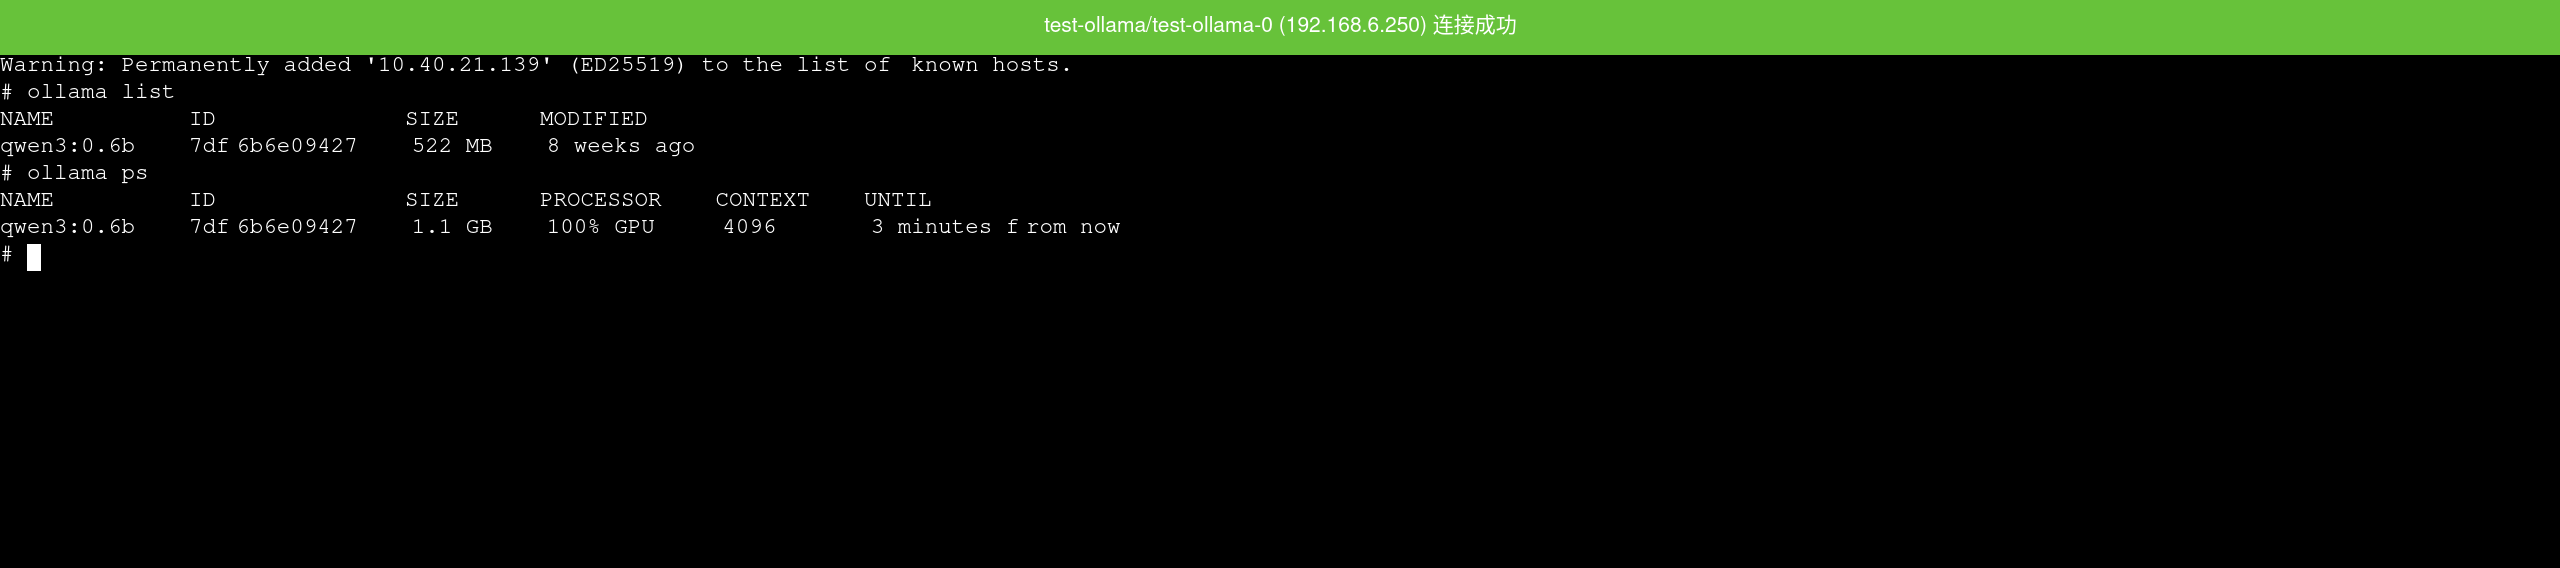
- If needed, enter the container via the Terminal on the details page and run
ollama listto check currently installed models. - Perform a connectivity and inference verification using the HTTP API.
First check if the service is accessible:
curl <service-url>/api/tags
If a model is already installed, run a chat request to verify:
curl <service-url>/api/chat \
  -H 'Content-Type: application/json' \
  -d '{
    "model": "<model>:<tag>",
    "messages": [
      {
        "role": "user",
        "content": "你好,请用一句话介绍你自己。"
      }
    ],
    "stream": false
  }'
If a model list or a normal JSON inference result is returned, the service is ready to serve.
If api/tags is accessible but the model list is empty, it usually means the instance has started successfully but no model has been mounted yet, or ollama pull has not completed.
Configuration
Image and Specifications
- Specification Selection: Refer to Inference Templates and select CPU/memory/GPU based on model size and concurrency requirements (focus on GPU VRAM).
- Image Selection: Refer to AI Images and use specific versions (tag/digest) for easier upgrades and rollbacks.
Model and Cache
- Model Library: Inference applications can use the Inference Model Library to centrally manage model sources, versions, and reuse strategies.
- Cache and Disk: Model files typically consume significant disk space. It is recommended to prepare persistent storage for model caching and logs, and establish cleanup policies to avoid disk overflow.
Network
- If you need to pull images or models externally, ensure the node has network connectivity and bandwidth to access the corresponding repositories.
Capacity and Changes
- Capacity: Monitor GPU VRAM, model loading time, and concurrency queue; when capacity is insufficient, prioritize evaluating more GPU resources or larger VRAM.
- Upgrade and Rollback: Perform changes through version management of AI Images; it is recommended to operate during off-peak hours.
- Observability: Focus on GPU/CPU utilization, VRAM usage, request latency, and error rates; use logs to diagnose issues such as model loading failures and insufficient VRAM.
FAQ
How to view service logs?
Via the frontend interface: Click the corresponding inference instance, go to the details page, then click Logs to view Ollama's service output logs, which is useful for error troubleshooting.
When troubleshooting, typically focus on:
- Whether model pulling, verification, or extraction failed.
- Whether insufficient VRAM, insufficient memory, or process exit occurred during model loading.
- Whether the service has successfully started listening on port
11434and is ready to serve inference requests.
If the instance was just created, it is recommended to check the logs along with the instance status, focusing on whether the model has been downloaded and whether the service has completed initialization.
How to access the terminal?
The Terminal on the instance details page allows you to directly enter the container, which is useful for checking current models, model cache directories, and disk usage.
For basic checks inside the container, you can run:
ollama list
ollama ps
du -sh /root/.ollama/models
ls -lah /root/.ollama/models
Node cannot see GPU / Abnormal inference performance
- Check whether the NVIDIA and CUDA Environment Setup has been completed.
- Run
nvidia-smion the node to verify the driver and GPU status.
Model download is slow or consumes too much disk space
- Check the network quality and bandwidth from the node to the model source/image repository.
- Plan the model cache directory and cleanup strategy to avoid disk overflow from long-term accumulation.
Startup failure or frequent OOM
- This is usually related to insufficient VRAM, excessive concurrency, or an oversized model; adjust the specifications (GPU/memory) or reduce concurrency, and monitor VRAM and memory peak usage.